

Table of Contents
- What Is a Manual Crimping Tool?
- How Manual Crimping Force Is Generated
- 8 Manual Crimping Tools Compared
- 8-Model Breakdown: Specs, Applications & Trade-offs
- Real-World Field Repair Case Studies
- When to Use a Manual Crimping Tool
- 3 Types: Hand-Pump / Split-Body / Pneumatic
- Manual vs Battery vs Electric Comparison
- Die Selection Guide
- Pros and Cons
- Safety & Best Practices
- How to Use a Manual Crimping Tool (Step by Step)
- When to Upgrade from Manual to Electric
- FAQ
What Is a Manual Crimping Tool?
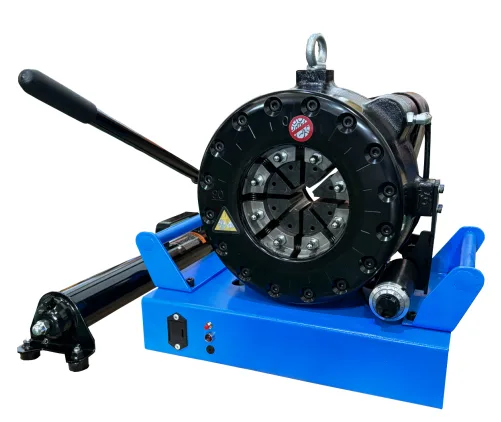
A manual crimping tool attaches fittings to hydraulic hoses without electricity. You operate it by pumping a handle or lever to build hydraulic pressure inside the tool. That pressure drives the die set closed around the fitting, compressing it onto the hose — a process known as cold-weld crimping.
Manual crimping tools generate 60 to 185 ton of force — enough to crimp hoses from 1/4″ to 2″ in diameter. They are lighter than electric models (15–34 kg), cheaper, and work anywhere: on a construction site, in a mine, or on a ship deck where power is not available.
The trade-off is speed. A manual crimping tool takes 60–90 seconds of hand pumping per crimp, compared to 8 seconds with an electric model. For shops doing fewer than 20 assemblies per day, that speed difference does not matter.
How much force do you actually need? According to SAE J517 hose standards, a 1/2″ R2 hose at 4,000 PSI working pressure needs roughly 60T to crimp properly. A 1″ R12 multi-spiral hose at 5,000 PSI needs 120T+. The force requirement depends on hose diameter, wire construction (braid vs spiral), and the fitting’s metal hardness.
The concept of crimping metal fittings onto flexible hoses dates back to the 1940s, when military vehicles needed reliable hydraulic connections that could withstand high pressure. Before crimping, fittings were secured with bands, clamps, or brazing — all of which failed under vibration and pressure cycling. The first manual crimping tools were bench-mounted units operated with a hand-turned screw. Hydraulic pump mechanisms replaced screws in the 1960s, multiplying force by a factor of 50–100x while keeping the tool portable.
Today, a manual crimping tool remains the most widely owned piece of hose assembly equipment worldwide. An estimated 60% of field service technicians carry one in their truck, according to fluid power industry surveys. The reason is simple: it works without any external power, costs under $2,000, and handles the majority of common hose sizes.
In terms of raw throughput, an experienced operator can complete 6–8 crimps per hour with a hand-pump manual crimping tool. An electric hydraulic hose crimper like the P32A pushes that to 30–40 per hour. But the electric model costs 3–5x more and needs a 220V outlet. For teams doing emergency field repairs — replacing a blown hose on a stopped excavator — the speed difference between 60 seconds and 8 seconds rarely affects the job. The bottleneck is getting to the machine, not the crimp cycle.
How Manual Crimping Force Is Generated
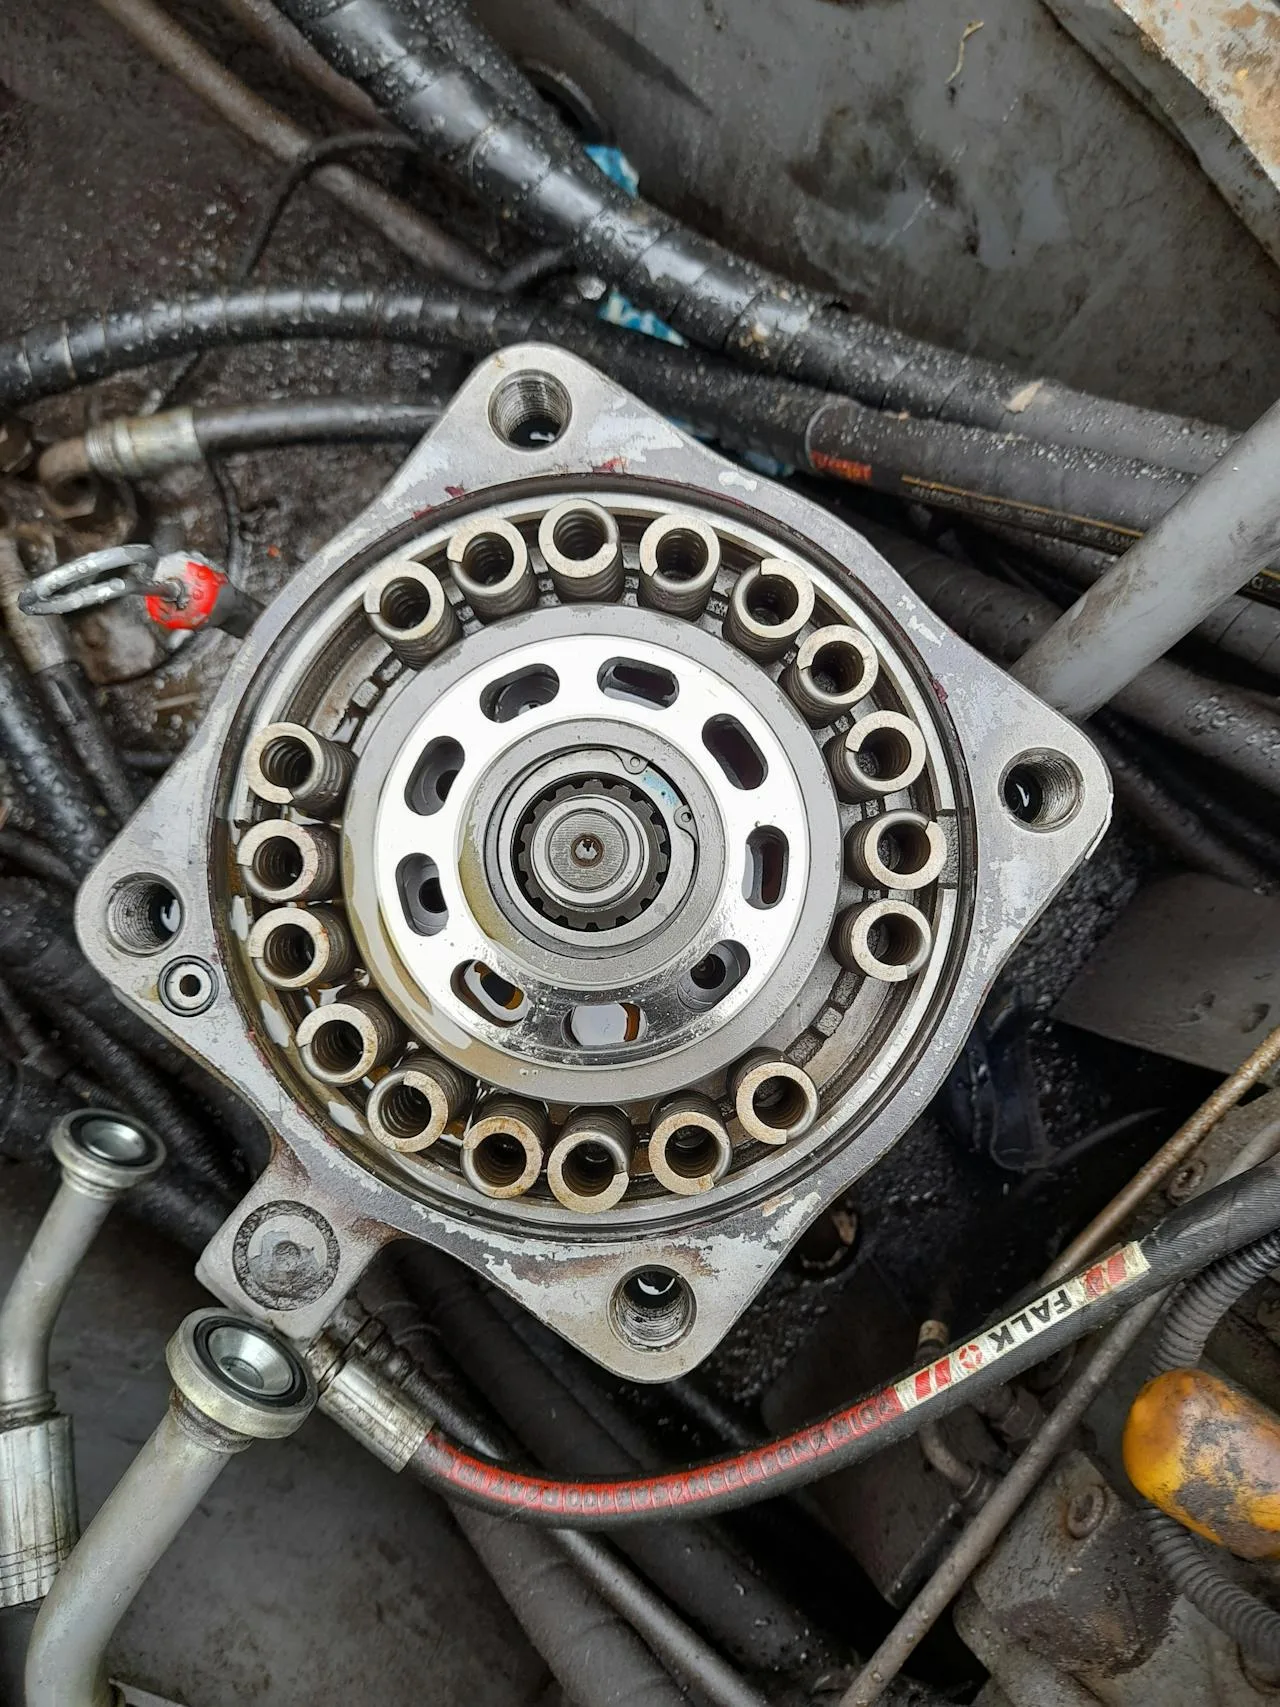
Every manual crimping tool relies on Pascal’s Law: pressure applied to a confined fluid is transmitted equally in all directions. When you pump the handle, a small piston (10–12 mm bore) pushes hydraulic oil into a large-bore cylinder (150–250 mm). Because pressure is equal throughout the fluid, the force multiplies proportionally to the area ratio. Over 60–80 pump strokes, pressure builds to 400–700 bar, generating 95–185 tons of crimping force.
The hydraulic cylinder pushes a cone-shaped mandrel into a die cage with 6–8 segments arranged in a circle. As the cone advances, the dies slide inward, compressing the ferrule uniformly around the fitting. This radial compression produces a round, concentric crimp — uneven compression would create weak spots that fail under pressure.
The force needed depends on hose construction. Wire-braided hoses (DIN EN 853 / ISO 1436) use 1–2 layers of braided wire — a 95T manual crimper handles these up to 1″. Wire-spiral hoses (DIN EN 856 / ISO 3862) have 4–6 spiral wire layers and need 150T+ even for 1″ sizes. For spiral hoses above 1-1/4″, switch to electric.
8 hand crimpers Compared
P10HP — 60T Compact
60T | 15 kg | 1/4″–5/8″ R1/R2
The lightest manual tool in the TRC line. Fits in a toolbox. 60T covers small hydraulic hoses — automotive, lawn equipment, light machinery.
P16HP — 95T Standard
95T | 34 kg | 1/4″–1″ 4SP
The most popular the tool. 95T handles 1″ 4SP, covering excavators, loaders, and most construction equipment. Open-head design loads from the side.
P16HPZ — 95T Split-Body
95T | 22 kg | 1/4″–1″ 4SP
Split-head opens completely to fit over already-connected hoses. For in-place repairs where you cannot slide the tool onto the hose end.
P16AP — 95T Pneumatic
95T | 28 kg | 1/4″–1″ 4SP
Shop-air powered instead of hand pump. Connects to a compressed air line (6–8 bar). Cycles in 15 seconds. For workshops with air supply.
P18XL — 150T Extended Range
150T | 30 kg | 1/4″–1½″ 4SP
Bridges the gap between portable and workshop crimpers. 150T handles 1½″ 4SP — larger excavators, mining loaders. Still portable at 30 kg.
P20LHP — 185T Heavy-Duty Manual
185T | 25 kg | 1/4″–1½″ 4SP
The strongest hand-pump crimper in the TRC range. 185T from a 25 kg package — one person carries it to the machine. Covers 90% of field repair jobs.
P20AP — 120T Air-Powered
120T | 28 kg | 1/4″–1″ 4SP
Pneumatic hand tool for workshop use. Faster than hand-pump (15-second cycle), no electricity needed — just compressed air.
P18HPZ — 120T Separate Pump
120T | 18 kg (head) | 1/4″–1¼″ 4SP
The pump is a separate unit connected by a hose. The crimp head weighs only 18 kg — easy to lift onto a machine. For overhead and tight-space crimping.
8-Model Breakdown: Specs, Applications & Trade-offs
P10HP — 60T Compact manual crimper
The P10HP weighs just 15 kg with 60T capacity covering 1/4″ to 5/8″ single-braid hoses (SAE 100R1, R2, R5, R16). Uses a single-stage pump: 15 pumps for 1/4″, 40 pumps for 5/8″. Integrated pressure relief valve prevents over-crimping.
Best for: Mobile mechanics, small-equipment repair, agricultural implement dealers. Limitation: Cannot handle 3/4″ or larger — step up to P16HP for mid-size excavators.
P16HP — 95T Standard hand crimper
The best-selling TRC manual model. 95T handles up to 1″ 4SP — covering most 20–40 ton excavators, loaders, and dump trucks. Open-head front plate lets you slide hose in from the side. 8-segment die cage for even radial compression. A 3/4″ R2 crimp takes ~50 pumps (45 sec); a 1″ 4SP takes 70–80 pumps (70–90 sec).
Best for: General construction repair, fleet maintenance, municipalities. Limitation: At 34 kg, it’s the heaviest 95T model — consider P16HPZ (22 kg) or P18HPZ (18 kg head) if weight matters.
P16HPZ — 95T Split-Body manual tool
The split-head collar opens 180° to fit around hoses already connected to the machine — ideal for in-place field repairs. Crimp quality matches the P16HP. Weight drops to 22 kg thanks to the smaller split-head casting. Handles up to 1″ 4SP.
Best for: Emergency field repair, mining operations, ship engine rooms with restricted access.
P16AP — 95T Pneumatic the tool
Replaces the hand pump with an air-over-hydraulic intensifier. Connect to shop air (6–8 bar) and the air motor builds full 95T in about 15 seconds. No electricity or CNC control — still classified as manual. Standard 1/4″ NPT fitting; ~30–40 liters air consumption per cycle.
Best for: Workshops with compressed air, mining maintenance bays (no spark risk), teams wanting faster cycles without investing in electric.
P18XL — 150T Extended Range hand-pump crimper
Bridges portable and workshop tools. 150T handles up to 1½″ 4SP and 1¼″ R12 — large mining excavators, haul truck steering, heavy marine hydraulics. At 30 kg, still portable. Die cage covers 1/4″ through 1½″ without switching tools.
Best for: Mining fleet maintenance, large construction, shipyards — when you need 1¼″–1½″ capability in the field.
P20LHP — 185T Heavy-Duty hand tool
The strongest TRC manual model at 185T. Covers every hose up to 1½″ 4SP and 1¼″ R12. Weighs only 25 kg thanks to a dual-stage hydraulic pump: fast advance for the first 40–50 strokes, then automatic switch to high-pressure mode for the final 20–30 strokes. A 1½″ 4SP crimp takes ~70–80 strokes vs 120+ on single-stage pumps.
Best for: Heavy equipment field service, mining, oilfield, military — one tool for 90% of field hose sizes.
P20AP — 120T Air-Powered Crimping Tool
120T with air-over-hydraulic operation. Shop air (6–8 bar) drives the pump in 15-second cycles. Covers up to 1″ 4SP and 1¼″ R1/R2. Built-in air regulator, pressure gauge, and low-pressure warning. More compact than hand-pump models at the same tonnage.
Best for: Workshops doing 15–30 crimps/day — a step up from hand-pump without the cost of full electric.
P18HPZ — 120T Separate Pump manual crimper
Pump and head are separate, connected by a 1.5m hydraulic hose. The head weighs just 18 kg — lightest in the 120T class. Supports foot-pedal operation, freeing both hands to steady the head and hose. Perfect for overhead work on ladders or in tight spaces.
Best for: Overhead repairs, confined spaces (ship engine rooms, mine tunnels), any work above chest height.

Real-World Field Repair Case Studies
Case 1: Excavator Boom Hose Failure — Construction Site, Texas
Situation: A 35-ton Komatsu excavator blew the boom cylinder hose (3/4″ SAE 100R12) during a foundation dig. The machine was positioned on a slope with no access for a service truck. Downtime cost: $1,200/hour.
Response: The on-site mechanic carried a P16HPZ split-body hand crimper (22 kg) up the slope. He cut out the blown section with a portable hose cutter, pushed a new fitting onto the cut end, and clamped the split-head tool around the hose without disconnecting the cylinder end.
Result: Total repair time was 18 minutes from hose failure to machine restart. The crimp measured 32.06mm against a spec of 32.00–32.15mm — well within tolerance. The excavator resumed digging and completed the pour schedule on time.
Tool choice rationale: A solid-head tool would have required threading the hose end through the die cage, which was impossible because the cylinder end was still bolted to the boom. The split-body design opened around the hose in place.
Case 2: Mining Truck Steering Hose — Underground Copper Mine, Chile
Situation: A Caterpillar 793F mining truck (230-ton payload) developed a steering hose leak at the 1″ 4SP return line. The truck was 3 km underground. Bringing it to surface would require a full shift of towing — 10+ hours of lost production.
Response: The mine maintenance team used a P20LHP 185T manual tool stored at the underground workshop bay. The mechanic skived the 1″ 4SP hose (required for spiral construction), inserted the fitting, and crimped using the two-stage pump. The 185T capacity handled the 1″ spiral hose with 70 pump strokes.
Result: Repair completed in 35 minutes. Pressure test at 1.5x working pressure (7,500 PSI) held for 10 minutes with no leak. The truck returned to haulage within the same shift.
Tool choice rationale: Underground mines often restrict electric tools due to explosion risk in certain zones. The P20LHP has no motor, no spark source, and operates on manual hydraulic power alone — making it safe for use in active mining areas.
When to Use a the tool
✅ Use a hand-pump crimper when:
You work on remote sites without power. You do fewer than 20 hose assemblies per day. You need a tool that fits in a service truck. You repair heavy equipment in the field — excavators, tractors, mining trucks. You need a backup crimper when the electric one is in use.
Beyond the obvious no-power scenarios, there are specific situations where a hand tool outperforms electric alternatives:
Emergency breakdowns on active machines. When a hydraulic hose blows on a $2M excavator sitting in a muddy pit, the priority is getting the machine running again. A manual crimper in the service truck means the mechanic starts crimping within minutes of arriving. No need to find a power outlet, run an extension cord, or wait for a generator.
Mobile service vans with limited space. A typical hose service van carries a hand crimper, 20–30 feet of hose in common sizes, an assortment of fittings, and a hose cutter. The entire crimping setup fits in a 60cm × 40cm area. An electric crimper with the same capacity would occupy twice the space and needs a power inverter or shore power connection.
Multiple remote work fronts. Construction sites with 3–4 active work zones often equip each zone with a manual tool rather than buying 3–4 electric models. Cost per zone drops from $4,000–8,000 to $1,200–2,000.
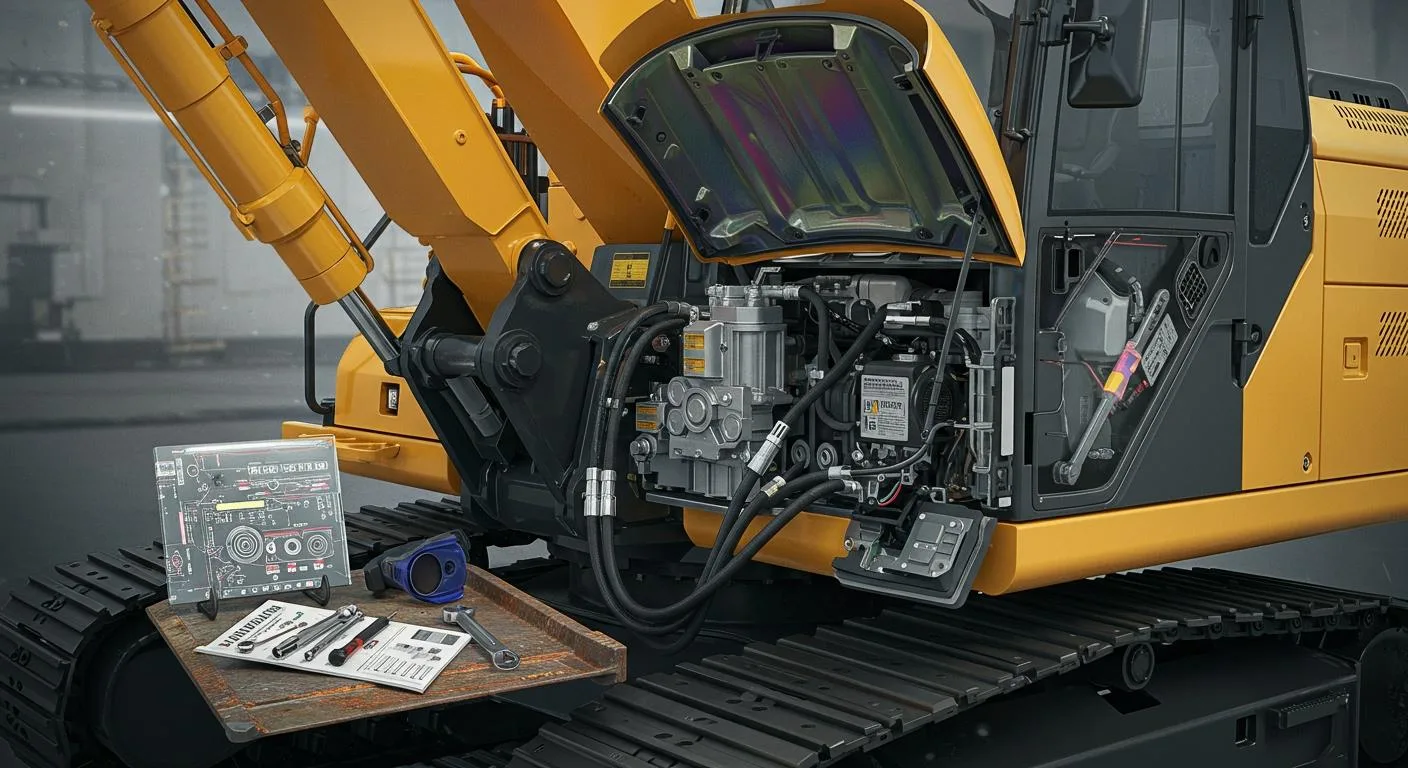
Engineering and construction machinery accounts for 62% of all hydraulic fitting consumption. A single excavator has 30–50 hydraulic hose assemblies — each one eventually needs replacement. In the field, a the tool saves hours of downtime compared to waiting for a service truck. When coiling finished assemblies, respect the hose minimum bend radius — coiling tighter than this damages the wire reinforcement internally. According to SAE J517 standards, bending below minimum radius reduces hose service life by up to 80%.
Hazardous environments. Oil rigs, chemical plants, grain silos, and underground mines often restrict electric tools in classified areas. A hand-pump crimper has no motor, no switches, and no spark-producing components. It is inherently safe for Zone 1 and Zone 2 hazardous areas where electric tools require explosion-proof enclosures (which cost $8,000+).
Training new technicians. A hand tool forces the operator to feel the crimping process — the increasing resistance as the dies close, the point where the ferrule bottoms out. This tactile feedback teaches new technicians what a proper crimp feels like, making them better operators when they later transition to electric models.
⚠️ Consider an electric model when:
You do more than 20 crimps per day. Hand fatigue becomes an issue. You need ±0.03mm CNC accuracy. You crimp the same hose size repeatedly and want automatic cycling.
3 Types: Hand-Pump / Split-Body / Pneumatic
| Type | How It Works | Speed | Best For |
|---|---|---|---|
| Hand-Pump | Pump handle to build hydraulic pressure | 60–90 sec/crimp | General field repair |
| Split-Body | Head opens fully, clamps around hose | 60–90 sec/crimp | In-place repair, over-the-hose |
| Pneumatic | Shop air drives the hydraulic pump | 15 sec/crimp | Workshop with air supply |
Hand-Pump Type — Detailed Operation
Close the release valve finger-tight. Pump with smooth, full strokes — the first 10–15 strokes feel easy as dies advance, then resistance builds as dies contact the ferrule. Stop when you feel a solid stop (dies fully closed). Open the release valve to retract. Maintenance: Check hydraulic oil level every 50 crimps; top up with ISO 32 oil if low.
Split-Body Type — Detailed Operation
Release the front collar latch and swing open 180° — die segments stay in their slots. Position around the hose with the ferrule centered in the die ring. Close and latch the collar (listen for a click), then pump as with hand-pump type. Critical: Always verify the latch is fully engaged before pumping — an unlatched collar can separate under full pressure.
Pneumatic Type — Detailed Operation
Connect shop air (6–8 bar) to the 1/4″ NPT fitting. Load hose into dies. Press the trigger or foot pedal — the air motor drives the hydraulic pump automatically, building full tonnage in ~15 seconds. Release trigger when cycle completes, then open release valve. Advantage: Consistent crimp force regardless of operator strength or fatigue — every crimp uses the same tonnage.
Manual vs Battery vs Electric Comparison
| Parameter | Manual (Hand-Pump) | Battery / Portable | Electric (Bench) |
|---|---|---|---|
| Force Range | 60–185T | 80–160T | 200–800T |
| Max Hose Size | 1½″ 4SP | 1¼″ 4SP | 4″+ R13 |
| Cycle Time | 60–90 sec | 15–25 sec | 8–12 sec |
| Weight | 15–34 kg | 12–25 kg | 50–500 kg |
| Power Source | Human force only | Li-ion battery (18–36V) | 220V / 380V outlet |
| Crimps Per Charge | N/A (unlimited) | 40–80 per charge | N/A (plug-in) |
| Accuracy | ±0.05mm | ±0.05mm | ±0.02–0.03mm (CNC) |
| Price Range | $800–$2,000 | $2,500–$5,000 | $2,500–$15,000 |
| Portability | ★★★★★ | ★★★★★ | ★★☆☆☆ |
| Throughput (crimps/hr) | 6–8 | 15–20 | 30–50 |
| Noise Level | Low (pump clicking) | Low–Medium | Medium–High (pump motor) |
| Maintenance | Oil level check, seal replacement every 2–3 years | Battery replacement every 2–3 years, same hydraulic maintenance | Motor brushes, pump seals, electronics |
| Hazardous Area Rating | Intrinsically safe (no spark source) | Varies (some models ATEX-rated) | Requires explosion-proof enclosure |
| Learning Curve | Low (30 min) | Low–Medium (1 hour) | Medium (2–4 hours for CNC programming) |
The table above shows why most hose shops own at least one manual crimper alongside their primary electric machine. The manual tool covers field work, power-outage situations, and small-volume days. The electric machine handles production runs. Battery tools occupy the middle ground — portable like a manual, fast like a small electric, but limited by battery life and higher upfront cost.
For shops deciding between adding a battery tool versus a second hand crimper, the math is straightforward. A battery portable hydraulic hose crimper costs $2,500–5,000 and handles 40–80 crimps per charge. A manual tool costs $800–2,000 and handles unlimited crimps (limited only by operator stamina). If your daily volume is under 15 crimps, the manual tool is the better investment. If you regularly need 20–40 crimps away from the workshop, a battery tool pays for itself in reduced fatigue within 6 months.
Die Selection Guide
The die set is the part of the manual tool that directly contacts the fitting. Dies are segmented metal pieces (usually 6 or 8 segments) arranged in a ring inside the die cage. Each die set is machined to produce a specific crimp diameter for a specific hose size, type, and fitting brand.
Selecting the wrong die set is the single most common cause of crimp failure. An undersized die over-compresses the fitting, crushing the inner tube and restricting flow. An oversized die under-compresses, leaving the ferrule loose enough to blow off under system pressure.
How to Select the Right Die
Step 1: Identify the hose. Read the lay line printed on the hose cover. It tells you the hose type (e.g., SAE 100R2AT), size (e.g., 1/2″), and manufacturer. If the lay line is worn off, measure the hose OD with a caliper and match it to a size chart.
Step 2: Identify the fitting. Check the fitting part number stamped on the ferrule or hex body. Each fitting manufacturer publishes a crimp specification sheet that lists the required die set and target crimp diameter.
Step 3: Cross-reference the die chart. TRC provides a die chart with every the tool. The chart lists: hose type × hose size × fitting series → die set number + target crimp diameter. Find your combination and note the die set number.
Step 4: Verify with a test crimp. Before crimping on the actual assembly, do a test crimp on a scrap piece of hose. Measure the crimped diameter with a caliper. If it matches the target (within ±0.05mm), proceed. If not, check that you have the correct die set and that the dies are seated properly in the cage.
Die selection also depends on fitting type. One-piece fittings (most common) have the ferrule integrated into the stem. Interlock fittings have a separate socket that wraps around the hose — these need dies with a larger inner diameter to accommodate the extra material. BSP thread fittings (British Standard Pipe) are common on European and Asian equipment. Metric thread fittings are standard on Komatsu, Hitachi, and Liebherr machines. Each fitting + hose size has a specific target crimp diameter listed in the die chart.
Common Die Mistakes
Mixing die sets from different manufacturers. Dies are not universal. A die set designed for a Parker fitting will not produce the correct crimp diameter on a Gates fitting, even if both are 1/2″ R2. Each manufacturer’s ferrule has a different wall thickness and metal hardness. Always match dies to the fitting brand.
Using worn dies. After thousands of crimps, die segment faces wear down. Worn dies produce slightly larger crimp diameters than the spec calls for. If your crimp measurements are drifting upward by more than 0.10mm over a few weeks, the dies need replacement.
Installing dies backward. Die segments have a specific orientation — the inside face is the crimp profile, and the outside face mates with the cone. Installing a segment backward produces an irregular crimp. Most TRC die segments have an alignment mark or number that must face outward.
Die Materials
Standard dies are made from hardened tool steel (HRC 58–62). This hardness level resists deformation under 185T of crimping force while maintaining a precise crimp profile. Hardened dies last 5,000–10,000 crimps under normal use.
For high-volume operations (50+ crimps/day), some manufacturers offer dies made from tungsten carbide inserts. These cost 2–3x more but last 3–4x longer. The carbide surface does not deform, maintaining crimp accuracy over 20,000+ cycles.
Die storage matters. Tossing loose die segments into a toolbox leads to nicks and dents on the crimp profile. Even a 0.1mm dent on a die face transfers to every crimp. Store dies in their original cases or on a peg board with labeled slots.
Pros and Cons of a hand-pump crimper
| Advantages | Limitations |
|---|---|
| No electricity needed — works anywhere | Slower than electric (60–90 sec vs 8 sec) |
| Lighter — 15–34 kg vs 50–500 kg | Hand fatigue on high-volume days |
| Lower cost — $800–2,000 vs $2,000–15,000 | ±0.05mm accuracy (vs ±0.03mm CNC) |
| Fewer parts to maintain | Limited to 1½″ hoses (185T max) |
| No motor noise | One crimp at a time |
Advantages — In Detail
No electricity needed. Construction sites, underground mines, ships at sea — a manual crimper works anywhere without infrastructure. Low total cost of ownership. Purchase price is $800–2,000 with no motor, circuit boards, or batteries. Annual maintenance averages under $300 (oil check + seal replacement). Fewer points of failure. ~30 moving parts vs 200+ in electric CNC crimpers. Intrinsically safe. No motor or spark — usable in oil refineries, grain elevators, and chemical plants without explosion-proof certifications ($3,000–5,000 extra for electric).
Limitations — In Detail
Speed limits throughput. At 60–90 seconds per crimp, a manual tool produces 6–8 assemblies per hour. The crossover point where electric becomes more economical is around 20 assemblies per day. Operator-dependent consistency. No digital readout — operators rely on feel and post-crimp measurement. Learning period takes 50–100 crimps under supervision. Physical effort adds up. 60–80 pumps per crimp is fine for a few assemblies; at 10–15/day, arm fatigue becomes noticeable. Pneumatic models eliminate this for workshop use.
Safety & Best Practices
Hydraulic hose assemblies operate at pressures from 1,000 to 6,000+ PSI. A failed crimp at these pressures releases stored energy violently. Proper safety procedures during the crimping process prevent both immediate injuries and delayed failures in the field.
Personal Protective Equipment (PPE)
Safety glasses. Always wear impact-rated safety glasses when crimping. Under rare conditions, a die segment can fracture under full tonnage and eject metal fragments. This risk increases with worn or damaged dies.
Steel-toe boots. The hand tool weighs 15–34 kg. Dropping it on a foot causes serious injury. Steel-toe boots are standard PPE in any hydraulic service environment.
Leather gloves. Gloves protect hands from sharp hose wire ends (stainless steel braid wires are needle-sharp after cutting) and from pinching during die loading. Choose gloves thin enough to feel the die alignment — heavy welding gloves reduce tactile feedback.
Hearing protection. Not required for manual crimpers (they are quiet). Required if using a pneumatic model, which produces 75–85 dB from the air motor exhaust.
Pressure Testing After Crimping
Every crimped assembly should be pressure-tested before installation. The industry standard test pressure is 1.5x to 2x the working pressure, held for 30 seconds to 5 minutes depending on the specification.
Test procedure:
1. Cap one end of the assembly. Connect the other end to a hydraulic test pump.
2. Fill the assembly with clean hydraulic oil, bleeding air from the high-point fitting.
3. Increase pressure gradually to the test pressure (e.g., 6,000 PSI test for a 4,000 PSI working pressure hose).
4. Hold for 30 seconds minimum. Watch the pressure gauge — any pressure drop indicates a leak.
5. Inspect the crimped ferrule for bulging, cracking, or oil weeping.
6. Release pressure, disconnect, and tag the assembly as tested.
Skip this step and you are trusting the crimp measurement alone. While caliper measurement is reliable when done correctly, pressure testing catches errors that measurement misses — a partially inserted stem, a contaminated hose end, or a ferrule with a hidden defect.
Operating Safety
Never exceed the rated tonnage. The pressure relief valve on a hand crimper is set at the factory to the tool’s maximum rated force. Do not adjust or disable this valve. Over-pressurizing the hydraulic system can rupture internal seals, spray hot oil, or cause the die cage to crack.
For maintenance: use 68# anti-wear hydraulic oil (ISO VG 68). Fill to 2/3 of the sight glass. The relief valve is set at 31.5 MPa — this is the maximum system pressure. If you over-pump and feel the handle “lock up,” you have reached the relief pressure. Stop pumping — forcing past this will damage seals.
Keep fingers clear of the die cage during operation. The dies close with 60–185 tons of force. A finger caught between die segments would be crushed instantly. Load the assembly, remove your hands from the die area, then start pumping.
Inspect the tool before each use. Check for hydraulic oil leaks around the pump body, cylinder, and hose connections. Look for cracks in the die cage or frame casting. Verify the release valve operates smoothly — a stuck release valve means you cannot retract the dies in an emergency.
Store the tool with the release valve open. This relieves pressure on the internal seals and extends seal life. A tool stored under pressure for weeks will develop seal compression set and eventually leak.
How to Use a manual tool (Step by Step)
1. Select the correct die set. Check your die chart for the hose type + size + fitting brand. Wrong dies = wrong crimp. If you are using a TRC the tool with non-TRC fittings, cross-reference the fitting manufacturer’s die chart — do not assume TRC dies match another brand’s specifications. Mark the die set number on the outside of each segment with a permanent marker for quick identification.
2. Cut the hose. Use a purpose-built hose cutter (abrasive wheel or shear-type), not a hacksaw. A hacksaw leaves ragged edges and sheds metal filings into the hose interior — those filings travel downstream and damage valves and cylinders. Cut squarely (90° to the hose axis). A 2° angle error can cause the fitting to seat crookedly, leading to an uneven crimp. Measure the hose length twice before cutting — you cannot add length back.
3. Skive if required. Skiving removes the outer rubber cover where the ferrule will grip. Required for 4SP, 4SH, and multi-spiral hoses (R12/R13/R15). Not required for most 1-braid hoses (R1/R2) with “no-skive” fittings. Skive length is typically marked on the ferrule — measure from the ferrule shoulder to the end and remove rubber to that point. An inline skiving machine does this cleanly, but a sharp utility knife works for field repairs. After skiving, the bare wire braid should be clean and free of rubber residue — any remaining rubber between the wire and ferrule reduces grip strength.
4. Insert the fitting. Push the fitting stem fully into the hose until it seats against the stop. You should feel a definite stop — the stem shoulder contacts the wire braid. If the stem does not go in fully, check for wire deformation at the cut end. Lubricate the stem with a thin film of clean hydraulic oil if insertion is tight. Never use grease or soap — these contaminate the hydraulic system. Slide the ferrule over the connection point. The ferrule should sit flush against the fitting body with no gap.
5. Load into the dies. Place the assembly into the die set of your hand-pump crimper. Center it — the ferrule must be aligned with the dies. The ferrule’s center line should match the die ring’s center line. Misalignment by even 2–3mm causes one side of the ferrule to be over-crimped while the other side is under-crimped. For split-body tools, close and latch the collar before pumping.
6. Pump and crimp. Close the release valve finger-tight. Pump the handle with smooth, full strokes — short, quick jabs are less efficient and build pressure unevenly. With a 95T tool and a 1″ hose, expect 60–80 pumps. You will feel increasing resistance as the dies contact and compress the ferrule. Stop pumping when you feel a solid stop — the dies have fully closed. Do not force extra pumps past this point.
7. Measure. Open the release valve. The dies retract. Remove the assembly and measure the crimp diameter with a vernier caliper at two points (90° apart) to check for ovality. Compare the average to the specification. ISO 8434 specifies tolerance ranges for each hose-fitting combination. If the measurement is outside the range, do not re-crimp — re-crimping compresses already-deformed metal, which weakens the joint. Cut off the fitting, prepare a new hose end, and crimp with a new fitting.
8. Pressure test. Connect the assembly to a test pump and pressurize to 1.5–2x working pressure. Hold for 30+ seconds. Any pressure drop or visible leak means the assembly fails. Re-measure the crimp diameter — a diameter that increases under pressure indicates the ferrule was not adequately compressed.
When to Upgrade from Manual to Electric
There is no single threshold that makes a hand tool obsolete. The decision depends on volume, hose sizes, accuracy requirements, and labor costs. Here are clear benchmarks:
You Should Upgrade When…
You crimp more than 20 assemblies per day on average. At this volume, hand-pump fatigue costs real time. An operator doing 25 crimps per day spends 25–35 minutes just pumping. An electric crimper cuts that to 3–4 minutes of total crimp cycle time. Over a month, the time savings equals a full workday.
You need to crimp hoses larger than 1½″. No manual crimper exceeds 185T. For 2″ R12, 2½″ R13, or larger multi-spiral hoses, a 200T+ electric crimper is the only option. Common in mining, marine, and industrial hydraulics.
Your customer requires CNC-level accuracy documentation. Some OEM customers (heavy equipment manufacturers, defense contractors) require crimp data logs showing exact force, diameter, and time for each assembly. CNC electric crimpers record this data automatically. A manual tool cannot generate these records.
You have multiple operators with varying skill levels. A hand crimper depends on operator technique — feel for the stop point, consistent pump speed, accurate caliper use. A CNC electric crimper removes this variable. The machine stops at the programmed diameter regardless of who is running it.
Labor cost per crimp exceeds $3. If an operator’s loaded labor cost is $35/hour and they produce 6 crimps per hour with a manual tool, labor cost per crimp is $5.83. With an electric tool at 35 crimps per hour, it drops to $1.00. At 20+ crimps per day, the $4.83/crimp savings pays for a $3,500 electric crimper in under 4 months.
You Should Keep Your Manual Tool When…
You do under 15 crimps per day. The electric crimper’s speed advantage does not translate to meaningful time savings at low volume.
You do field repairs more than workshop production. An electric crimper needs a 220V outlet. It stays in the shop. Your manual tool goes to the machine.
Budget is the primary constraint. A good the tool costs $800–2,000. The cheapest reliable electric crimper starts at $2,500. If the budget allows only one tool, a manual model covers more scenarios for less money.
The ideal setup for most hose shops is one electric crimper for production work and one hand-pump crimper for field calls and backup. The manual tool costs less than 10% of the electric machine’s price but covers situations the electric tool cannot reach.
FAQ
Can a hand tool handle 2-inch hydraulic hoses?
How long does it take to crimp with a hand crimper?
Is a the tool accurate enough for industrial use?
What is the difference between a hand tool and a manual pipe crimping tool?
Do I need to replace dies on my hand crimper?
Can I use one manual tool for different fitting brands?
How do I maintain a the tool?
What happens if I over-crimp a hose fitting?
Need a hand-pump crimper?
TRC builds 12 manual and pneumatic crimping tools from 60T to 185T. For field repair, workshop backup, or no-power locations.
Related: Manual Hydraulic Hose Crimper Buying Guide · How to Crimp a Hydraulic Hose
Get a Quote →


