
Table of Contents
- Quick Specs — Fitting + Tool Overview
- What Is a Hydraulic Hose Fitting Crimping Tool?
- How Fitting Crimping Works
- Fitting Types Explained
- Fitting Structure: One-Piece vs Interlock vs Reusable
- Choosing the Right Crimping Tool by Fitting Type
- Step-by-Step: Crimp a Hydraulic Hose Fitting
- Crimp Tolerance & Quality
- Common Mistakes That Ruin Fittings
- Fitting Compatibility Across Brands
- FAQ
- Need a Reliable Crimping Setup?
Quick Specs — Fitting + Tool Overview
| Parameter | Typical Range |
|---|---|
| Hose sizes covered | ¼” to 4″ ID (DN 6–DN 100) |
| Fitting thread types | JIC 37°, ORFS, BSP, NPT, metric, SAE flange |
| Crimp force (small shop) | 20–60 tons |
| Crimp force (industrial) | 60–200 tons |
| Crimp force (heavy-duty) | 200–1,750 tons |
| Crimp tolerance | ±0.05 mm (general), ±0.03 mm (safety) |
| Die material | Cr12MoV / SKD11, HRC 58–62 |
| Die life | 5,000–10,000 crimps per set |
| Measurement tool | Vernier caliper (0.02 mm resolution) |
| Proof test pressure | 1.5× working pressure, hold 5 min |
This table gives you the baseline numbers at a glance. Every parameter above — from thread type to crimp tolerance — is something you need to match when you pick a hydraulic hose fitting crimping tool and set up your crimp procedure. The sections below walk through each one in detail.
What Is a Hydraulic Hose Fitting Crimping Tool?
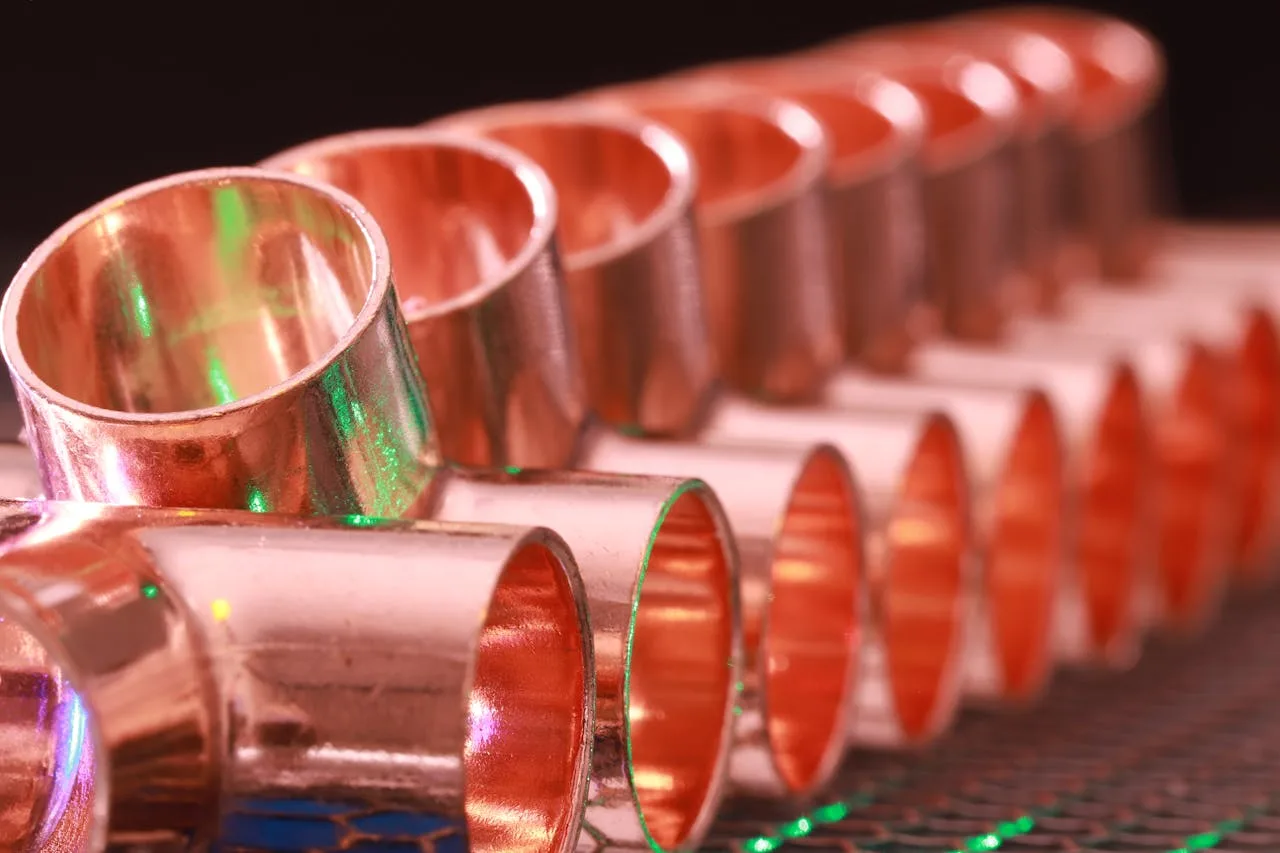
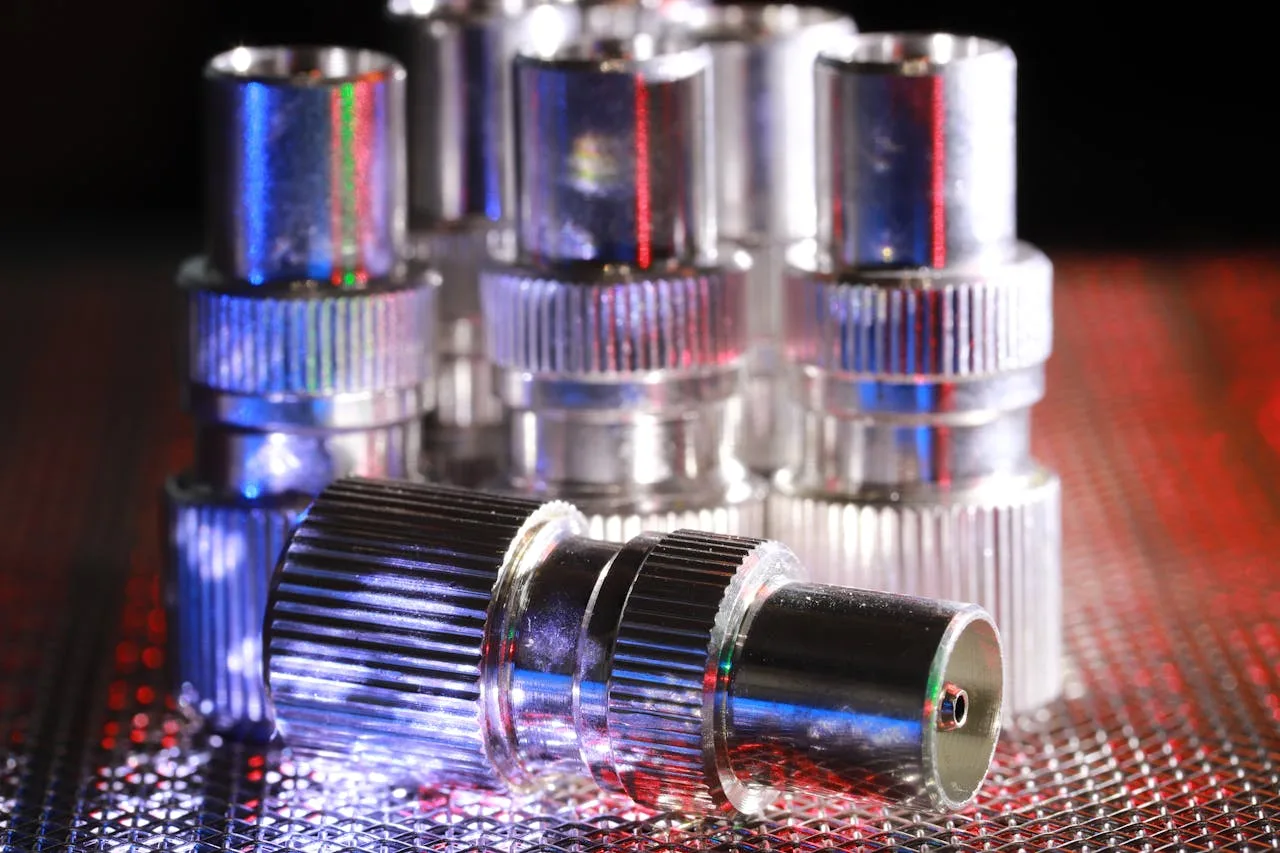
A hydraulic hose fitting crimping tool is a machine that presses a metal ferrule around the end of a wire-reinforced hydraulic hose, permanently attaching a fitting to the hose assembly. The fitting — a JIC, ORFS, BSP, metric, or flange connector — slides onto the hose, the ferrule wraps over the junction, and the tool’s dies squeeze the ferrule down until it forms a tight, pressure-rated mechanical bond with the hose’s wire braid or spiral layers.
That bond has to hold under extreme conditions. A typical hydraulic system runs at 3,000–5,000 PSI. Mining and oil-field equipment pushes past 6,000 PSI. If the crimp is even slightly off-spec — too loose, too tight, or off-center — the fitting can blow off under pressure. That’s why the right tool, the right die, and the right procedure matter. According to hose coupling standards, a properly crimped fitting must resist pull-out forces exceeding the hose’s rated burst pressure.
These tools range from handheld manual units that generate 20 tons of force, like the TRC P10HP compact crimper, up to floor-standing CNC machines that deliver 1,750 tons for 4-inch spiral hose. The P32D CNC crimper sits in the middle — 200 tons of force, motorized die closure, and digital readout for repeatable accuracy.
What separates a fitting crimper from a generic press is precision. The dies are machined to match specific hose-fitting combinations within ±0.05 mm. A shop press might squeeze metal, but it can’t hold that tolerance on a consistent basis. The crimping tool is built for one job: making hydraulic assemblies that don’t leak and don’t blow apart.
How Fitting Crimping Works
Crimping a fitting onto a hydraulic hose is a cold-weld process. No heat, no solder, no adhesive. The ferrule — a cylindrical metal sleeve that comes pre-attached to one-piece and interlock fittings — gets compressed radially by the dies inside the crimping tool. Under enough force, the ferrule deforms inward, gripping the hose’s outer cover, pushing through to the wire reinforcement layer, and locking the fitting stem inside the hose bore.
Here’s what happens at each stage:
Ferrule positioning. The fitting stem inserts into the hose bore. The ferrule sits over the hose OD, covering the area where the stem’s barbs or serrations grip the inner tube. For interlock fittings, the ferrule wraps around the hose and snaps into a groove on the stem.
Die closure. The crimping tool’s dies close around the ferrule. Each die segment presses inward with equal force. The number of die segments (usually 6 to 10) determines how round the final crimp stays. More segments = closer to a true circle = less stress concentration.
Cold-weld bond. As the ferrule compresses, it pushes the outer rubber cover against the wire braid or spiral layer. The wire layer bites into the ferrule’s inner surface. Simultaneously, the stem’s barbs dig into the hose’s inner tube. The result is a three-way mechanical lock: ferrule-to-wire, ferrule-to-rubber, and stem-to-inner-tube.
Pressure-rated seal. A properly crimped assembly holds at least 1.5× the hose’s rated working pressure during proof testing. The SAE J517 standard defines pressure ratings for each hose type (R1, R2, R12, R13, R15), and the crimp has to match. If the ferrule is under-crimped, the fitting pulls out under pressure. Over-crimped, and the hose inner tube collapses, restricting flow or cracking the stem.
The force required depends on the hose size and construction. A ½” R2 braided hose needs about 30–40 tons. A 2″ R13 six-wire spiral hose can demand 350 tons or more. That’s why matching the tool to the job is non-negotiable — a 60-ton manual crimper physically cannot compress a 2″ spiral assembly.
The hydraulic mechanism behind the tool follows Pascal’s Law: pressure applied to a confined fluid transmits equally in all directions. The pump builds oil pressure (up to 31.5 MPa in standard crimpers), which pushes the ram forward. The ram drives the die segments inward, compressing the ferrule uniformly from all sides.
Fitting Types Explained
Not all hydraulic fittings are the same. The thread profile, sealing method, and pressure rating change from one type to another. Using the wrong fitting type for your system is one of the fastest ways to create a leak — or a safety hazard. Below are the five major families you’ll encounter.
The hose construction behind each fitting matters. Wire-braided hoses (DIN EN 853 / ISO 1436) use 1–2 braided wire layers. Wire-spiral hoses (DIN EN 856 / ISO 3862) use 4–6 spiral layers. Spiral hoses need a hydraulic hose fitting crimping tool with higher tonnage because the extra wire reinforcement resists compression. A fitting that works on a braided hose may need a completely different die set for the same size spiral hose.
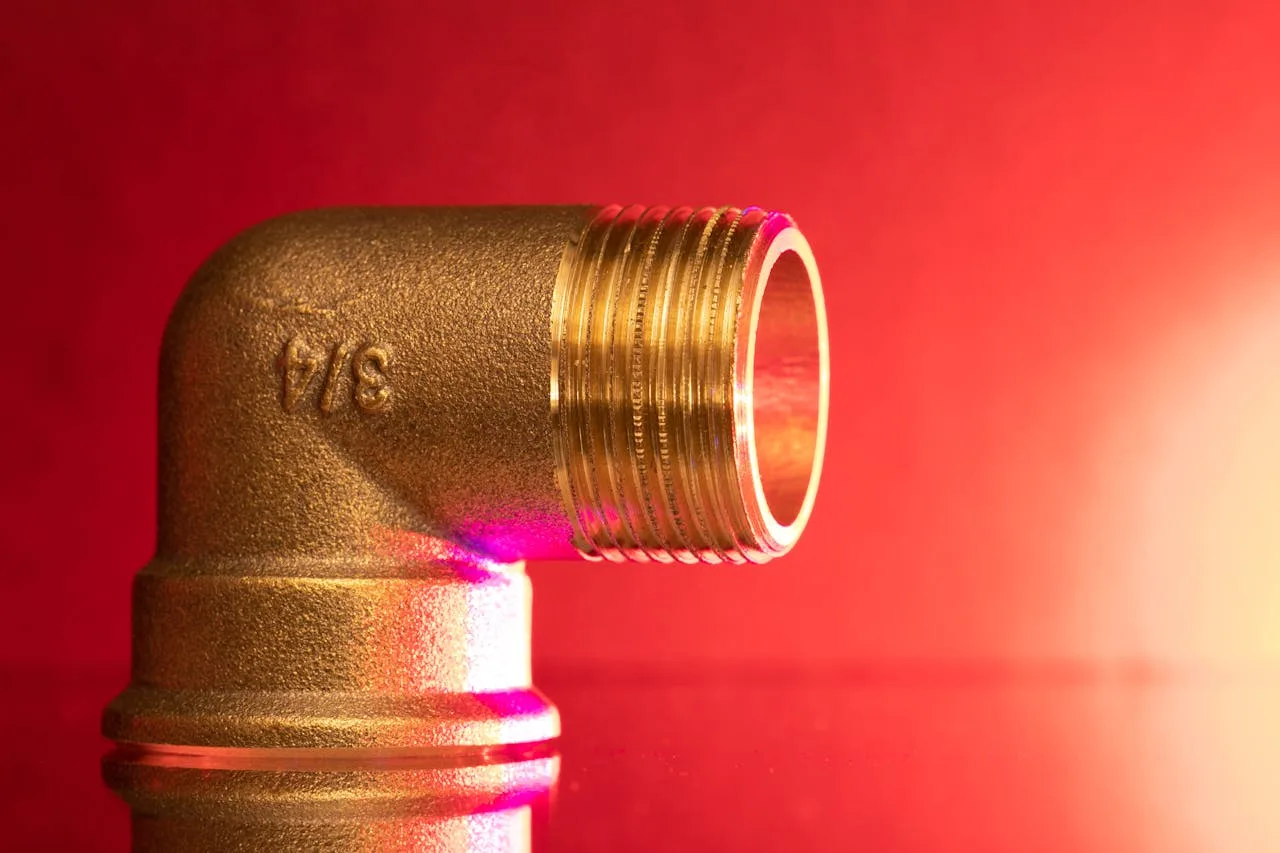
JIC 37° Flare (SAE J514)
The JIC 37° flare is the most widely used hydraulic fitting in North America and a common sight on mobile equipment worldwide. It seals through metal-to-metal contact: the 37° flare on the fitting nose presses against the matching flare inside the port or swivel nut. No O-ring, no sealant — just clean, dry metal under compression.
JIC fittings handle working pressures up to 5,000 PSI for sizes up to 1″. They’re popular because they’re easy to assemble, tolerant of minor misalignment, and available from every hydraulic fitting manufacturer. The trade-off: the metal-to-metal seal can weep if the flare surface gets scratched or contaminated. Always inspect the flare cone before assembly, and never over-tighten — the flare can crack.
ORFS — O-Ring Face Seal (SAE J1453)
ORFS fittings seal with an O-ring seated in a flat face on the fitting. When the swivel nut tightens, the O-ring compresses against the mating flat surface on the port. This design handles vibration far better than JIC — the O-ring maintains a seal even when the connection flexes under load. That’s why ORFS shows up on excavators, loaders, and other equipment subject to constant shock and movement.
Pressure rating is 5,000 PSI across standard sizes. The O-ring is the wear item: it degrades over time, especially in high-temperature systems. Replace the O-ring any time you disconnect an ORFS fitting, and use the correct durometer rating for your system’s temperature range.
BSP — British Standard Pipe (BS 21)
BSP comes in two flavors: BSPP (parallel) and BSPT (tapered). BSPP seals with a bonded seal or O-ring on the face, while BSPT relies on thread deformation — the tapered threads jam together and create a seal through mechanical interference, often with thread sealant. BSP is the standard across Europe, the UK, Australia, and much of Asia. If you work on European-made equipment — Liebherr, Bosch Rexroth, Danfoss — you’ll see BSP threads.
BSPP fittings are easier to reseal because the O-ring or bonding washer is replaceable. BSPT fittings can be harder to work with: the threads gall and cross-thread easily, and over-tightening can crack the fitting body. Pressure ratings top out around 6,000 PSI for smaller sizes.
Metric (DIN 2353 / ISO 8434)
Metric fittings follow the DIN 2353 standard for compression fittings and ISO 8434 for flange and threaded connections. The compression style uses a ferrule (called a “cutting ring” in DIN terminology) that bites into the tube OD when the nut is tightened. The ISO flanged types use flat-face or O-ring seals similar to SAE flanges but with metric bolt patterns.
Metric fittings dominate on equipment from Germany, Italy, Japan, and Korea. The DIN 2353 compression fitting handles pressures up to 8,000 PSI in the “LL” (light), “L” (light), and “S” (heavy) series. If you’re working on a Liebherr crane or a Bosch Rexroth hydraulic power unit, expect metric threads.
SAE Flange (SAE J518 — Code 61 & Code 62)
SAE flanges are the go-to for large-diameter, high-pressure connections. Code 61 flanges are rated to 3,000 PSI; Code 62 to 6,000 PSI. The flange head bolts to a mating block with four bolts, and an O-ring in the flange groove provides the seal. You’ll find flanges on hydraulic pumps, valve banks, and any application where a threaded connection would be too large or too hard to torque in a tight space.
Flange connections are forgiving — the O-ring does the sealing, so bolt torque doesn’t need to be as precise as with a JIC metal-to-metal seal. But the bolts must be tightened evenly in a cross pattern. Uneven bolt torque warps the flange face and causes leaks.
Fitting Structure: One-Piece vs Interlock vs Reusable
Beyond thread type, fittings come in three structural designs. Each one crimps differently, and using the wrong die or procedure for the fitting structure is a guaranteed way to get a bad assembly.
| Feature | One-Piece | Interlock | Reusable |
|---|---|---|---|
| Construction | Stem and ferrule are a single forged piece | Stem and ferrule are separate; ferrule snaps into stem groove | Two-piece bolt-together design, no crimping needed |
| Crimp method | Standard radial crimp with matching die set | Radial crimp, but requires specific interlock die profile | No crimp — socket bolts onto stem, gripping the hose mechanically |
| Hose preparation | Cut to length, push fitting in until it bottoms | Cut, skive if required, push stem in, slide ferrule over hose OD | Cut, insert stem, bolt socket over hose |
| Typical use | Low- to medium-pressure, general purpose | High-pressure spiral hose (4SP, 4SH, R12, R13) | Emergency field repairs, low-pressure temporary lines |
| Pressure rating | Up to hose rating (varies by size) | Up to hose rating, better blow-off resistance | Typically limited to 50–70% of hose rating |
| Reusability | Single use — once crimped, permanent | Single use — permanent | Reusable — can be disassembled and re-fitted |
| Cost | Low | Medium | High (machined components) |
One-piece fittings are the default for most shop-floor crimping. The stem and ferrule are forged as a single unit, so there’s nothing to align or snap together — just push the stem into the hose and crimp. They work well for braided hose (R1, R2) and smaller spiral sizes. The TRC P16HP manual crimper handles one-piece fittings on hoses up to 1-¼” with 60 tons of force.
Interlock fittings are built for high-pressure applications where the fitting must resist pull-out forces that would rip a one-piece ferrule off the hose. The ferrule wraps around the hose and locks into a machined groove on the stem. When crimped, the ferrule, wire layer, and stem are locked together in three dimensions. If you’re building assemblies for mining or oil-field equipment with R12 or R13 spiral hose, interlock fittings are standard practice.
Reusable fittings don’t need a hydraulic hose fitting crimping tool at all. They’re assembled with wrenches — the socket clamps down on the hose when you tighten the bolts. They’re useful for emergency repairs in the field when you don’t have a crimper available, but they carry lower pressure ratings and cost far more per fitting. Use them as a stopgap, not a permanent solution.
Choosing the Right Crimping Tool by Fitting Type
The crimper must match three things: the fitting structure, the hose size range, and the force required. Here’s a practical reference table that maps common fitting types to suitable manual and electric crimpers from the TRC lineup.
| Fitting Type | Hose Size | Force Needed | Recommended Tool |
|---|---|---|---|
| JIC / BSP / NPT one-piece | ¼”–1″ | 20–60 T | P10HP or P16HP |
| JIC / ORFS one-piece | ½”–1-¼” | 40–95 T | P16HP or P32A |
| Interlock (4SP / 4SH) | ¾”–2″ | 95–185 T | P32A or P32D |
| Interlock (R12 / R13) | 1″–3″ | 200–450 T | P32D or P140 |
| SAE Flange | 1″–2″ | 60–200 T | P32A or P32D |
| Field repair (any fitting) | ¼”–1″ | 20–60 T | P20LHP or P20CS |
| Multi-size shop work | ¼”–2″ | Up to 200 T | P18XL or P16HPZ |
A few things to keep in mind when selecting:
Die availability matters more than tonnage. A 200-ton crimper is useless if the manufacturer doesn’t make dies for your specific fitting brand and hose combination. Before you buy, confirm that the die catalog covers the fittings you use. Most crimping tool manufacturers publish die charts — cross-reference your fitting part numbers against the chart.
Portable vs stationary is a workflow decision. If you crimp at a bench all day, get a floor-standing unit. If you drive to job sites and crimp in the field, a battery-powered P20CS or a manual P20LHP makes more sense. Some shops keep both — a big CNC machine for production work and a portable unit for service calls.
CNC vs manual is an accuracy decision. Manual crimpers rely on the operator to stop at the right diameter. CNC crimpers motorize the die closure and shut off at a pre-set dimension. If you’re doing 50 identical assemblies a day, CNC saves time and eliminates operator error. For occasional use, manual works fine — just measure every crimp.
Step-by-Step: Crimp a Hydraulic Hose Fitting
This procedure covers the standard crimp for a one-piece or interlock fitting on a braided or spiral hydraulic hose. The steps are the same regardless of which hydraulic hose fitting crimping tool you use — only the die selection and crimp diameter change.

Step 1 — Measure and Cut the Hose
Cut the hose to the required length using a rotary cutoff saw or a dedicated hose cutting machine. A clean, square cut is essential — angled cuts cause the fitting to seat unevenly, leading to an off-center crimp. Measure from cut end to cut end, accounting for the fitting insertion depth.
Step 2 — Mark the Insertion Depth
Consult the fitting manufacturer’s data sheet for the exact insertion depth for your hose-fitting combination. Mark this depth on the hose outer cover with a marker or scribe. This mark is your visual reference — the fitting must go in this far, no more, no less.
Step 3 — Skive If Required
Check whether your fitting requires skiving — removal of the outer rubber cover so the ferrule contacts the wire layer directly. High-pressure spiral hose (4SP, 4SH, R12, R13) almost always requires external skiving. Safety-critical assemblies (brake, steering) may require both internal and external skiving. If skiving is needed, use a dedicated skiving machine before proceeding.
Step 4 — Select the Correct Die Set
Pull the manufacturer’s die chart. Find your fitting part number and hose size. The chart specifies which die set to use and the target crimp diameter. Using the wrong die is the single most common cause of crimp failure — never guess. If the chart isn’t available for your specific fitting, contact the fitting manufacturer.
Step 5 — Install the Dies in the Crimper
Install the die segments into the crimper head. Make sure each segment is fully seated and the retaining clips or bolts are secure. Wipe the die faces clean — debris between the die and ferrule creates uneven crimp pressure. Close the die cavity to verify that all segments align properly.
Step 6 — Insert the Fitting Into the Hose
Lubricate the fitting stem lightly with clean hydraulic oil. Push the stem into the hose bore until it reaches the depth mark from Step 2. For interlock fittings, slide the ferrule over the hose OD and snap it into the stem groove. You should feel a positive engagement. If the stem doesn’t go in smoothly, check for hose damage or a deformed stem — don’t force it.
Step 7 — Position the Assembly in the Crimper
Place the hose-fitting assembly into the open die cavity. The ferrule must be centered in the dies — use the die stop or depth gauge to position it. If the ferrule sits too close to the die edge, one side gets more compression than the other. Double-check that the hose isn’t twisted and the fitting is aligned straight.
Step 8 — Crimp
Activate the crimper. On a manual unit, pump the handle until the dies close to the target diameter. On a CNC machine like the P32D, set the target dimension on the controller and press start — the machine shuts off automatically. Do not stop mid-crimp and restart. The ferrule must be compressed in one continuous stroke.
Step 9 — Measure the Crimp Diameter
Open the dies and remove the assembly. Measure the crimped ferrule diameter with a vernier caliper at the center point of the crimp, in two perpendicular directions. Average the two readings. Compare against the target diameter from the die chart. If the measurement falls within the specified tolerance (typically ±0.05 mm), the crimp passes. If it’s outside tolerance, tag the assembly as reject.
Step 10 — Proof Test the Assembly
Pressurize the completed assembly to 1.5× its rated working pressure. Hold for 5 minutes. Check for leaks at the crimped end, the fitting connection point, and along the hose body. Zero leakage = pass. Any seepage, weeping, or bubble formation = fail. Record the test pressure and result for traceability.
Crimp Tolerance & Quality
A crimp that “looks right” isn’t good enough. Hydraulic assemblies operate at pressures where a 0.1 mm error in ferrule diameter can mean the difference between a fitting that holds for years and one that blows off next week. Quality control is about measurement, not guesswork.
Die material determines long-term crimp consistency. Quality dies are made from Cr12MoV tool steel hardened to HRC 58–62. The die seat must be even harder — at least HRC 60 — to prevent deformation over thousands of cycles. Worn dies cause diameter drift, which leads to loose or over-tight crimps.
The ±0.05 mm Standard
General-purpose hydraulic assemblies target a crimp tolerance of ±0.05 mm from the manufacturer’s specified diameter. That’s about the thickness of a human hair. For safety-critical applications — brake systems, steering hydraulics, lifting equipment — the tolerance tightens to ±0.03 mm. These numbers come from industry standards referenced in SAE J517 and the crimp specification sheets published by major fitting manufacturers.
Measuring With a Vernier Caliper
Use a vernier caliper with 0.02 mm resolution. Digital calipers are fine, but verify zero before each measurement session. Measure the ferrule at the center of the crimped zone — not at the edges, where the die profile tapers. Take two readings at 90° to each other. If the ferrule is oval (one reading larger than the other by more than 0.1 mm), the die alignment is off, or the hose wasn’t centered in the die cavity.
Pull-Out Testing
For production shops, pull-out testing provides another layer of verification. A completed assembly is placed in a tensile test machine, and force is applied axially until the fitting separates from the hose. The pull-out force must exceed the minimum specified by the fitting manufacturer — typically 1.5× to 2× the force that working pressure would generate on the fitting. Pull-out testing is destructive, so it’s done on sample assemblies, not on parts going into service.
Visual Inspection Checklist
After every crimp, check these items before the assembly leaves the bench:
- Ferrule diameter within tolerance (measured)
- No visible cracks in the ferrule or fitting body
- No exposed wire at the crimp edge
- Hose outer cover not excessively compressed beyond the ferrule
- Fitting stem not collapsed or deformed inside the hose
- No rubber extrusion from under the ferrule
Common Mistakes That Ruin Fittings
Most crimp failures trace back to one of five errors. None of them require advanced technical knowledge to avoid — they’re basic process failures that happen when someone skips a step or takes a shortcut.
Construction equipment dominates hydraulic fitting demand — engineering machinery accounts for 62% of all hydraulic fitting consumption. This means most shops that buy a hydraulic hose fitting crimping tool service excavators, loaders, and dump trucks. The variety of equipment means they see every fitting type — JIC, ORFS, BSP, metric, and flange — often in the same day.
1. Wrong Die Set
This is number one for a reason. Every hose-fitting combination has a specific die set and target crimp diameter. Using a die meant for a Parker fitting on a Gates fitting — or using a die sized for ¾” hose on a 1″ hose — produces a crimp that’s either too loose or too tight. Always check the die chart. If you’re unsure, call the fitting manufacturer. A two-minute phone call beats a hydraulic blowout.
2. Fitting Not Fully Seated
The fitting stem must bottom out inside the hose. If it’s even 3 mm short of full insertion, the barbs on the stem don’t engage the inner tube properly, and the ferrule crimps onto a section of hose that has no stem behind it. The result: the hose collapses inward at the crimp, or the fitting pulls out under moderate pressure. Push the stem in until it stops. Verify against the insertion depth mark from Step 2.
3. Skipping the Skive
When a fitting requires external skiving, the ferrule must contact the wire reinforcement directly. If you skip the skive and crimp over the rubber cover, the ferrule compresses the rubber but never reaches the wire. Under pressure, the rubber creeps, the ferrule loosens, and the fitting separates. Check the fitting data sheet — if it says “skive required,” skive the hose. No exceptions.
4. Re-Crimping a Fitting
If a crimp comes out oversize, do not run it through the crimper a second time. The ferrule has already been work-hardened by the first compression. Re-crimping creates internal stress concentrations that can cause the ferrule to crack under pressure. If the first crimp fails tolerance, cut the fitting off, prepare a new hose end, and start over. It costs a fitting, but it’s the only safe option.
5. Not Measuring the Crimp
“It looks right” is not a quality control method. Measure every crimped assembly with a vernier caliper. Record the measurement. If you’re doing production work, keep a log. This takes 15 seconds per assembly and catches problems before they become field failures. Shops that skip measurement are shops that eventually send out bad assemblies — and get callback after callback.
Fitting Compatibility Across Brands
This is where things get complicated — and where the Reddit questions pile up. Can you crimp a Parker fitting with a Gates die? Can you use a Weatherhead ferrule on a Goodyear hose? The short answer: sometimes, but only if the manufacturers’ published data says it’s OK. The long answer follows.
Why Compatibility Is a Problem
Fitting dimensions vary between brands, even for the same nominal hose size. Parker’s ½” one-piece fitting has a slightly different ferrule OD and insertion depth than Gates’ ½” fitting. The difference might be 0.3 mm — invisible to the naked eye, but enough to change the crimp diameter by a meaningful amount. If you use a die ground for Parker’s ferrule on a Gates fitting, the crimp ends up either too tight or too loose.
The Practical Rules
Same brand fitting + same brand die = safe. Every fitting manufacturer publishes die charts for their own products. Follow those charts and you’re covered.
Cross-brand is OK only with published approval. Some crimping tool manufacturers (including TRC) publish cross-reference charts showing which dies work with which fitting brands. These charts are based on dimensional testing — the tool maker has verified that the die produces a crimp within tolerance for the listed fitting. If a cross-reference chart exists for your combination, use it with confidence.
No chart = don’t do it. If you can’t find a published die chart for your fitting-crimper combination, don’t guess. The risk isn’t worth it. Either use the correct die, or switch to a fitting brand that your crimping tool supports.
Common Cross-Reference Scenarios
| Fitting Brand | Crimper | Compatible? | Notes |
|---|---|---|---|
| Parker | TRC (with correct die) | Yes | Use TRC’s Parker cross-reference chart |
| Gates | TRC (with correct die) | Yes | Die profiles differ from Parker — use Gates-specific die |
| Weatherhead | TRC (with correct die) | Yes | Weatherhead uses unique ferrule profiles — dedicated die required |
| Parker fitting | Gates crimper + Parker die | Sometimes | Only if Gates publishes a die for Parker fittings |
| Brand A fitting | Brand B crimper + Brand B die | No | Different ferrule geometry — crimp will be out of spec |
Thread compatibility is separate from crimp compatibility. A JIC 37° fitting from Parker has the same thread geometry as a JIC 37° fitting from Gates — they’ll thread into the same port. But the ferrule dimensions and crimp requirements differ. Thread compatibility doesn’t mean crimp compatibility.
The safest approach: standardize on one fitting brand and one crimping tool brand. Build your die inventory around that combination. It limits your flexibility slightly, but it eliminates the guesswork.
FAQ
Can I mix fitting brands on the same hose assembly?
Each end of a hose assembly can use a different fitting — for example, a JIC on one end and a BSP on the other. But on a single crimped end, stick to one brand. The ferrule, stem, and die must be from compatible sources. Mixing a Parker stem with a Gates ferrule on the same crimp is asking for a failure, because the internal dimensions don’t match.
What hydraulic hose fitting crimping tool do I need as a beginner?
Start with a manual crimper that covers ¼” to 1″ hoses — this range handles 80% of common repair work. The P16HP is a solid entry point: 60 tons of force, covers R1 and R2 braided hose up to 1-¼”, and the manual operation teaches you the feel of a proper crimp. Add a vernier caliper, a set of dies for your fitting brand, and a hose cutter. That’s your starter kit.
How do I know which fitting type my equipment uses?
Check the equipment’s service manual — it specifies the thread type and size for every hydraulic port. If the manual isn’t available, identify the fitting visually: JIC has a 37° flare cone, ORFS has a flat face with an O-ring groove, BSP has parallel or tapered threads, and metric threads are measured in millimeters rather than inches. When in doubt, take the old fitting to a hydraulic supplier and ask them to match it.
I damaged a fitting during crimping — can I fix it?
No. A damaged fitting — cracked ferrule, deformed stem, visible stress marks — must be discarded. Cutting it off and starting over with a new hose end and a new fitting is the only safe option. Attempting to re-crimp or repair a damaged fitting creates a weak point that can fail catastrophically under pressure. The cost of one replacement fitting is trivial compared to the cost of a hydraulic blowout.
Are crimping dies universal between brands?
No. Dies are ground to match specific ferrule profiles. A die set for Parker fittings won’t produce the correct crimp diameter on a Gates fitting, even if both are for ½” hose. Always use the die specified in the crimping tool manufacturer’s die chart for your exact fitting part number.
Do I need to skive the hose before crimping?
It depends on the fitting. No-skive fittings are designed to crimp directly over the rubber cover — the ferrule’s internal profile is ground to push through to the wire layer without removing the cover first. Skive-type fittings require you to strip the outer rubber so the ferrule contacts the wire directly. Check the fitting data sheet: if it says “skive required,” you must skive. If it says “no-skive,” don’t skive — the ferrule geometry expects the rubber to be there.
How often should I replace crimping dies?
Dies made from Cr12MoV or SKD11 tool steel at HRC 58–62 typically last 5,000 to 10,000 crimps. Inspect the die faces periodically for wear, chipping, or rounding of the crimp profile. If the dies start producing out-of-tolerance crimps — or if you see visible wear on the contact surfaces — replace them. Worn dies don’t apply even pressure, which leads to oval crimps and reduced pull-out strength.
Can I crimp a hydraulic hose in the field without power?
Yes. Manual crimpers use a hand pump to generate hydraulic pressure — no electricity required. The P20LHP portable crimper weighs 12 kg and produces 40 tons of force from a manual pump. For field work where you want speed without hunting for an outlet, the P20CS battery crimper runs on a rechargeable lithium battery and delivers 35 tons per charge cycle.
Need a Reliable Crimping Setup?
Build Hydraulic Assemblies That Hold
From 20-ton portables to 1,750-ton CNC machines, TRC makes crimping tools that match your fitting types, hose sizes, and workflow. Browse the full line or contact us for a custom die recommendation.


