

Table of Contents
- What Is a Hydraulic Hose Machine?
- 5 Components of a Hose Crimping System
- 3 Types of Hose Crimping Machines
- Hose Standards Explained: SAE, DIN, ISO
- Workshop Setup Guide: Equipment You Need
- Real-World Case Study: Building a Hose Workshop from Scratch
- Cost Analysis: ROI of Different Crimping Setups
- Safety Guidelines for Hose Crimping Operations
- Industry Applications: 5 Sectors That Rely on Hydraulic Hose Crimping
- How to Choose a Hydraulic Hose Machine
- Common Problems & Solutions (Troubleshooting Guide)
- FAQ
What Is a Hydraulic Hose Machine?
A hydraulic hose machine is the equipment used to cut, prepare, and crimp hydraulic hoses into finished assemblies. In most workshops, “hose machine” refers to the crimper — the unit that presses a fitting onto a hose using hydraulic force. But a complete hose machine setup also includes a cutter, skiver, and test bench.
Workshops that assemble hydraulic hoses need a crimping setup that can handle their common hose sizes, deliver repeatable crimp accuracy, and keep up with daily production volume. A small repair shop might process 5–10 assemblies per day. A dedicated hose distributor could produce 200+.
The force range of these machines typically runs from 80 ton (for 1/4″–1″ hoses) up to 320 ton (for 2″–6″ industrial hoses). Electric models with CNC control can crimp a fitting in 8 seconds with ±0.03mm accuracy — tight enough to meet the ISO 8434 standard for hydraulic connections.
Historical Background
The hydraulic hose industry traces back to the 1940s, when World War II drove demand for flexible fluid-conducting lines on military vehicles and aircraft. The first purpose-built crimping machines appeared in the 1960s, evolving from mechanical levers to hydraulic-pump-driven systems by the 1970s. Modern CNC crimpers now feature touchscreens, automatic die sensing, and data logging — reducing assembly defect rates from roughly 3% to under 0.5%.
Market Size and Growth
The global hydraulic hose market was valued at approximately $12.5 billion in 2024 and is projected to reach $18 billion by 2030, growing at a CAGR of around 6%. China accounts for roughly 35% of global production, with manufacturers like TRC exporting to over 80 countries at price-performance ratios 30–50% below Western brands while meeting the same international standards.
5 Components of a Hose Crimping System
A complete hydraulic hose machine workshop needs five pieces of equipment working together:
| Component | What It Does | Example Model |
|---|---|---|
| Crimper | Presses fitting onto hose with hydraulic force | P32A (200T electric) |
| Cutter | Cuts hose to length with clean, square edge | C250CS (portable) / C580CS (CNC) |
| Skiver | Removes outer rubber cover for proper crimp | S50 (benchtop) |
| Test Bench | Pressure-tests finished assembly to 1.5× WP | External or integrated |
| Dies | Metal segments that form the crimp profile | Standard sets (SAE/DIN/EN) |
Not every workshop needs all five. A field repair truck might carry just a portable crimper and cutter. A production workshop needs the full set. See our portable hydraulic hose crimper guide for field kit recommendations.
Component Details: Crimper
The crimper is the heart of any hose assembly setup. It uses a hydraulic cylinder to push a set of dies inward, compressing the ferrule around the hose and fitting. The force is measured in metric tons. Most workshop crimpers operate between 80T and 320T.
Key crimper specifications to check:
- Closing force: Determines the maximum hose size. 200T covers up to 2″ SAE R13. 320T covers up to 6″ R15.
- Closing stroke: The distance the die holder travels. Longer strokes accommodate larger diameter ranges without changing dies.
- Die opening: The maximum diameter the dies can open to accept a hose assembly. Typical range: 10mm to 160mm.
- Cycle time: Electric machines complete a crimp in 8–15 seconds. Manual machines take 30–60 seconds of pumping.
- Motor power: Electric crimpers use 1.5kW to 4kW motors. Single-phase 220V for small workshops, three-phase 380V for production lines.
Component Details: Cutter
A hydraulic hose cutter must produce a clean, square cut without deforming the wire reinforcement. Friction-based cutters (like the C300 and C580CS) use a rotating blade that slices through the rubber and wire braid. This method leaves a flat end that seats properly in the fitting.
Saw-type cutters are cheaper but produce debris and can leave angled cuts on larger hoses. For hoses above 1″, a friction cutter is strongly recommended. Cutting capacity ranges from 1/4″ to 6″ depending on the model. Production workshops should consider a CNC cutter with a digital length stop for repeatable cuts.
Component Details: Skiver
Skiving removes the outer rubber cover from the hose end so the ferrule can grip the wire braid directly. On 1-braid hoses (SAE 100R1, R2), some fittings can be crimped without skiving — the ferrule compresses through the rubber. On multi-spiral hoses (4SP, R12, R13), skiving is mandatory.
There are two types: external skivers (remove outer cover) and internal skivers (remove the inner tube). External skiving is far more common. The S50 benchtop skiver handles hoses from 1/4″ to 2″. CNC skivers offer programmable skive length and automatic blade positioning.
Component Details: Test Bench
A pressure test bench proves the assembly holds pressure before it goes into service. Industry standard is testing at 1.5× the working pressure for 30 seconds to 3 minutes. For a 4,000 PSI hose, that means testing at 6,000 PSI.
Test benches range from simple hand-pump units ($500) to fully automated systems with data logging ($5,000+). Automated benches record the test pressure, hold time, and pass/fail result for each assembly — critical for workshops supplying to mining or oil and gas clients who require documented proof testing.
Component Details: Dies
Die hardness matters more than most operators realize. Quality dies are made from Cr12MoV or SKD11 tool steel with hardness ratings of HRC 58–62. The die seat must be even harder — at least HRC 60 — to prevent deformation over thousands of crimp cycles. Soft or worn dies cause diameter drift, which means loose fittings and leaks.
Dies come in 8-segment or 10-segment configurations. More segments mean smoother, more even crimp compression. For critical applications (brake lines, lifting equipment), 10-segment dies are the standard. Standard die sets cover the most common hose types: SAE 100R1/R2, R4, R12, R13, R15, EN 853/856, and 4SP/4SH/6SH.
Each die set is specific to a hose type and size combination. A workshop handling 10 different hose types across 6 sizes needs 60 die sets. CNC machines with automatic die sensing reduce setup errors by displaying the correct die number on screen.
Fitting types also affect die choice. Common hydraulic fitting styles include one-piece fittings (simplest, lowest cost), interlock fittings (two-piece design that grips both the inner tube and outer cover — required for high-pressure spiral hoses), and reusable fittings (bolt-together, no crimping needed but bulky and expensive). Thread types span BSP (British Standard Pipe, common in Europe/Asia), metric (common on German and Japanese equipment), and SAE (North American standard). Each fitting + hose combination has its own target crimp diameter.
3 Types of Hose Crimping Machines
1. Manual Hose Crimping Machine
Uses a hand pump to generate hydraulic pressure. No electricity needed. Force ranges from 95T to 185T. Typical models: P16HP (95T), P20HP (120T), P18XL (150T).
Best for: Field repairs, small shops, low-volume work (under 20 assemblies/day).
When to choose manual: A mobile repair truck servicing construction sites or farms often has no reliable power source. A manual crimping unit runs on operator effort alone. The P16HP at 95T handles hoses up to 1″ SAE 100R2 — enough for most agricultural and light construction equipment.
The trade-off is speed and fatigue. Each crimp requires 20–40 strokes of the hand pump. At 10 assemblies per day, that is manageable. At 30 per day, the operator’s arms will feel it. Manual machines also lack any measurement system — the operator judges crimp completion by feel or by watching the die gap, which introduces inconsistency.
Maintenance is simple. A manual unit has a hand pump, a cylinder, and a die holder. There is no motor to burn out, no circuit board to fail. Flush the hydraulic oil once a year and check seals for leaks. Most manual machines run 10+ years with minimal service.
2. Electric Hose Crimping Machine
Motor-driven hydraulic pump. Semi-automatic or CNC-controlled. Crimp cycle: 8–15 seconds. Force: 80T to 320T. Models like P32A (200T) and P140 (320T).
Best for: Workshops producing 20–200 assemblies/day. Most popular type.
When to choose electric: Any workshop with a permanent location and access to 220V power should seriously consider an electric crimper. The P32A at 200T covers 90% of common hydraulic hose sizes — everything from 1/4″ to 2″ SAE 100R series. At $2,500–4,000, it pays for itself within months compared to outsourcing assemblies.
Electric machines use a solenoid valve to control the hydraulic cylinder. The operator sets the crimp diameter (or selects a stored profile), inserts the hose, and presses the foot pedal. The machine closes the dies, reaches the target diameter, and retracts — all in 8–12 seconds.
A related spec to know: minimum bend radius. Every hose has a published minimum bend radius — bending tighter than this kinks the wire reinforcement and shortens hose life dramatically. A 1″ SAE 100R2 hose has a minimum bend radius of 200mm. When assembling hoses on your hydraulic hose machine, keep this in mind for storage and coiling finished assemblies. According to SAE J517 hose standards, bending below the minimum radius reduces hose life by up to 80%.
For workshops handling mixed hose types, the ability to store and quickly recall crimp profiles is a major time saver. Switching from a 1/2″ R2 assembly to a 1″ R12 assembly takes seconds: select the profile, swap the dies, and crimp. No recalibration needed between hose types if the machine stores separate profiles.
3. CNC Hose Crimping Machine
Touchscreen control stores die profiles, crimp diameters, and hose specifications. Automatic die closing, measurement, and error checking. Models: P32D (200T CNC), NC20, NC30.
Best for: High-volume production (200+/day), distributors, and quality-critical applications.
When to choose CNC: Distributors shipping hundreds of assemblies daily need consistency that no manual setup can guarantee. A CNC crimper stores hundreds of crimp profiles — each one defined by hose type, hose size, fitting brand, and target crimp diameter. The operator scans a barcode or selects from the screen, and the machine automatically adjusts.
CNC models include built-in error detection. If the operator inserts the wrong die, the machine displays an alert. If the crimp diameter deviates from the stored target by more than the allowed tolerance, the machine flags the assembly as a reject. This level of control is essential for workshops supplying to mining companies, oil rigs, or any client that requires documented quality assurance.
Data logging is another CNC advantage. Every crimp is recorded with a timestamp, operator ID, hose specifications, crimp diameter, and pass/fail status. This data can be exported for quality reports or compliance audits. For workshops seeking ISO 9001 certification, this traceability is not optional — it is a requirement.
✅ Electric/CNC Advantages
- 8-second crimp cycle
- ±0.03mm repeat accuracy
- No hand fatigue
- CNC stores hundreds of profiles
- Data logging for quality records
- Automatic error detection
⚠️ Manual Advantages
- No power required
- Works anywhere
- Lower cost
- Fewer parts to maintain
- 10+ year service life
- Ideal for remote field service
Hose Standards Explained: SAE, DIN, ISO
Choosing the right crimping equipment starts with understanding which hose standards your workshop uses. Three standards bodies define hydraulic hose construction, pressure ratings, and dimensional requirements: SAE (Society of Automotive Engineers), DIN/EN (Deutsches Institut für Normung / European Norm), and ISO (International Organization for Standardization).
These standards matter because each hose type requires a specific crimp profile and die set. A machine set up for SAE 100R2 will not correctly crimp an EN 856 4SP hose, even at the same nominal diameter. The wire layers, cover thickness, and ferrule dimensions are different.
Hydraulic hoses come in two main construction types. Wire-braided hoses (covered by DIN EN 853 / ISO 1436) use one or two layers of braided steel wire for reinforcement — these handle working pressures up to 330 bar (1-wire) or 420 bar (2-wire). Wire-spiral hoses (covered by DIN EN 856 / ISO 3862) use 4 or 6 layers of spiral-wound wire, reaching working pressures up to 420 bar (4SP) or 460 bar (4SH). Your hydraulic hose machine must have enough tonnage to crimp through all those wire layers.
SAE J517 — The Most Common Standard
SAE J517 defines the 100R series of hydraulic hoses, which dominate the North American market and are widely used globally. Here are the types most relevant to hose crimping operators:
| SAE Type | Construction | Pressure Range (PSI) | Typical Sizes | Crimp Force Needed |
|---|---|---|---|---|
| 100R1 | 1-wire braid | 500–2,750 | 1/4″–2″ | 80–120T |
| 100R2 | 2-wire braid | 500–5,000 | 1/4″–2″ | 80–200T |
| 100R4 | Wire helix (suction) | Up to 300 | 3/4″–4″ | 120–200T |
| 100R12 | 4-spiral wire | 1,500–5,000 | 1/2″–2″ | 150–200T |
| 100R13 | 6-spiral wire | 1,500–5,000 | 3/4″–4″ | 200–320T |
| 100R15 | 6-spiral wire (high) | 2,500–6,000 | 3/4″–2″ | 200–320T |
The R1 and R2 series are the bread and butter of most workshops. They cover standard hydraulic systems on tractors, loaders, excavators, and factory equipment. R12 and R13 hoses appear on high-pressure systems like rock crushers, hydraulic presses, and large mining shovels.
DIN EN Standards — Common in Europe
European and many Asian markets use DIN EN hose standards. These hoses often have different wall thicknesses and wire configurations compared to SAE equivalents, which means different crimp specifications:
| DIN EN Type | Equivalent | Key Difference from SAE |
|---|---|---|
| EN 853 1SN | SAE 100R1 | Thinner cover, requires skiving less often |
| EN 853 2SN | SAE 100R2 | Same wire braid, different cover spec |
| EN 856 4SP | SAE 100R12 | Higher working pressure than R12 |
| EN 856 4SH | — | High-pressure 4-spiral, no direct SAE equivalent |
| EN 857 1SC/2SC | Compact R1/R2 | Smaller bend radius, tighter dimensions |
Workshops that serve both American and European equipment need dies and crimp profiles for both standards. A CNC crimper with a large profile library handles this easily. Manual machines require the operator to look up each specification and set the die gap accordingly.
ISO Standards
ISO 8434 defines the dimensions and performance requirements for hydraulic fittings and connections. ISO 1436 and ISO 3862 cover hose construction. While SAE and DIN define the hose itself, ISO standards ensure that fittings from different manufacturers are dimensionally compatible.
For crimping machine operators, the relevant ISO standards affect the fitting side of the crimp equation. ISO 8434-1 (flareless fittings), ISO 8434-2 (37° flare), and ISO 8434-3 (ORFS) each have specific ferrule dimensions that require matching die profiles.
Workshop Setup Guide: Equipment You Need
Here are three typical workshop setups, based on daily output:
| Setup | Daily Output | Crimper | Cutter | Skiver | Approx. Cost |
|---|---|---|---|---|---|
| Field Kit | 5–10 | Manual P20LHP | Portable C250CS | Hand tool | $2,000–3,000 |
| Small Workshop | 20–50 | Electric P32A | Benchtop C300 | S50 | $5,000–8,000 |
| Production Line | 100–300 | CNC P32D or P140 | CNC C580CS | CNC Skiver | $12,000–20,000 |
Key spec to match: Your crimper force must cover the largest hose you assemble. For 1″ 2SP, you need 95T minimum. For 2″ R13, you need 200T+. Check the crimp specifications for your fitting brand before buying.
Understanding hose standards helps you choose the right machine: SAE J517 defines hose construction (R1 = one-wire braid, R2 = two-wire braid, R12/R13 = multi-spiral). Higher-pressure hoses (R12/R13/4SP/6SH) require more crimping force. A 200T machine covers all SAE 100R series through 2″. A 320T machine covers up to 6″ (R15).
Detailed Setup Recommendations by Budget
Budget Setup ($2,000–4,000): Start with a manual crimper (P16HP or P20HP) and a portable cutter. Add a hand skiving tool. This handles 5–15 assemblies per day. You can always upgrade to electric later and keep the manual unit as a backup or field unit. Many workshops start this way and expand as orders grow.
Mid-Range Setup ($5,000–10,000): The sweet spot for most independent workshops. An electric P32A (200T), benchtop friction cutter (C300), and benchtop skiver (S50) form the core. Add a basic pressure test bench ($500–800) and a full set of dies for your common hose types ($800–1,500). This setup pays for itself within 3–6 months at typical workshop pricing of $15–30 per assembly.
Production Setup ($12,000–25,000): CNC crimper (P32D or P140), CNC cutter with digital length stop, CNC skiver, and automated test bench with data logging. This handles 100–300 assemblies per day with full traceability. Add a conveyor or workbench system to organize workflow. Factor in training time — CNC machines require 2–3 days of operator training to use effectively.
Workspace Layout Tips
Arrange your crimping workstation in a linear flow: hose storage → cutting → skiving → fitting insertion → crimping → testing → labeling. This reduces handling time and prevents mistakes. Allow at least 3 meters of bench space for each station in a production setup.
Lighting is critical. Crimp inspection requires good visibility to check for even compression, exposed wire, and proper insertion depth. Install bright, shadow-free lighting above the crimper. A magnifying lamp helps for small-diameter hoses (1/4″–3/8″).
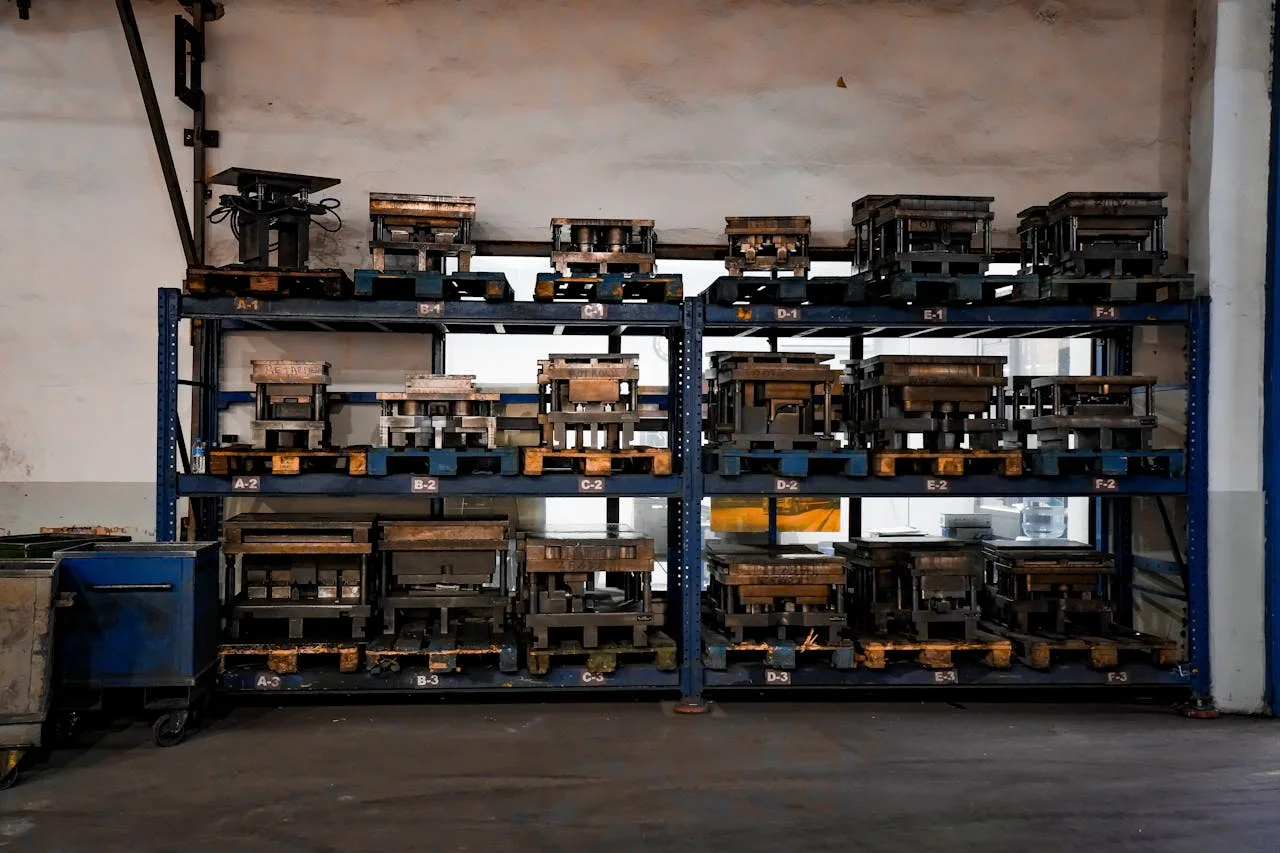
Store dies in a labeled rack or drawer system near the crimper. Number each die set and match it to the profile stored in the machine. A disorganized die collection leads to wrong-die errors — one of the most common causes of crimp failure.
Real-World Case Study: Building a Hose Workshop from Scratch
📍 Case Study: Midwest Hydraulic Services — Peoria, Illinois
Owner: Jake Morrison · Started: March 2023 · Staff: 1 → 4 · Monthly assemblies: 0 → 450
Jake Morrison spent 12 years as a heavy equipment mechanic before deciding to open his own hydraulic hose assembly shop. He had the skills but had never bought or operated a dedicated crimping machine. Here is how he built his workshop from zero.
Month 1: Research and First Purchase
Jake’s biggest customer was a local construction company with 40 pieces of equipment — excavators, loaders, dozers, and dump trucks. They were spending $4,000–6,000 per month on hose assemblies from the nearest distributor, a 90-minute drive away. Jake calculated he could beat their price by 30% and offer same-day service.
He bought a P32A electric crimper (200T), a C300 benchtop cutter, an S50 skiver, and die sets for SAE 100R1, R2, R4, and R12 in sizes 3/8″ through 1-1/2″. Total investment: $6,200 including shipping. He also bought a basic pressure test bench for $650.
The first week was spent learning the machine. Jake practiced on scrap hose, making 50 test crimps to build consistency. He measured every crimp with a digital caliper and compared results against the die chart specifications. By day five, his crimp accuracy was within ±0.04mm.
Month 3: Breaking Even
By month three, Jake was assembling 80–100 hoses per month. His pricing was $18–35 per assembly depending on hose size and fitting type, with an average revenue of $25 per hose. Monthly revenue: roughly $2,200. His material costs (hose, fittings, hydraulic oil for the test bench) ran about $900 per month. With the machine payment and overhead, he broke even in month three.
Month 8: Scaling Up
Word spread. Two mining companies and a farm equipment dealer started sending regular orders. Volume hit 300 assemblies per month. Jake hired his first employee and upgraded to a P32D CNC crimper ($4,800) to handle the volume and reduce training time for the new operator. The CNC’s stored profiles meant the new hire could produce accurate crimps from day one.
He also added a second cutter and organized the workshop into two parallel stations. One station handled standard SAE R1/R2 assemblies. The other handled R12/R13 and DIN EN hoses for mining clients. Die storage went from a toolbox to a labeled wall rack.
Month 18: Full Production
At 18 months, Midwest Hydraulic Services employed four people and produced 450 assemblies per month. Revenue reached $11,000–13,000 per month. Jake had invested a total of $22,000 in equipment over 18 months. His return on that investment was roughly 180% based on annual profit.
Cost Analysis: ROI of Different Crimping Setups
💰 Quick ROI Formula
Months to break even = Equipment cost ÷ (Monthly assemblies × Revenue per assembly – Monthly material cost)
The economics of a hydraulic hose machine are straightforward: you buy the equipment once, and every assembly you produce generates margin. The question is how fast you reach payback. Here are realistic numbers based on current market pricing.
Scenario 1: Side Business / Field Repair
| Item | Cost |
|---|---|
| Manual crimper (P16HP, 95T) | $850 |
| Portable cutter (C250CS) | $650 |
| Hand skiver + basic dies | $350 |
| Total investment | $1,850 |
At 15 assemblies per week (a realistic side-business volume) with $20 average revenue and $7 material cost per assembly, you generate $13 per assembly in gross profit. Weekly profit: $195. Payback: 9–10 weeks.
Scenario 2: Dedicated Workshop (Electric)
| Item | Cost |
|---|---|
| Electric crimper (P32A, 200T) | $3,200 |
| Benchtop cutter (C300) | $1,100 |
| Benchtop skiver (S50) | $800 |
| Pressure test bench | $650 |
| Die sets (6 types × 5 sizes) | $1,800 |
| Total investment | $7,550 |
At 40 assemblies per day × 22 working days = 880 per month. Average revenue $25, material cost $10, gross profit $15 per assembly. Monthly gross profit: $13,200. Subtract rent, utilities, and one employee ($3,500). Net monthly profit: $9,700. Payback: under 1 month.
This scenario assumes you have enough customer demand to fill 40 assemblies per day from the start. In reality, most workshops ramp up over 3–6 months. A more conservative estimate: 200 assemblies per month in month one, growing to 800 by month six. Payback in 2–3 months.
Scenario 3: Production Line (CNC)
| Item | Cost |
|---|---|
| CNC crimper (P32D, 200T) | $5,800 |
| CNC cutter (C580CS) | $2,800 |
| CNC skiver | $2,200 |
| Automated test bench with logging | $3,500 |
| Complete die sets (all standards) | $3,500 |
| Workbenches, storage, lighting | $2,000 |
| Total investment | $19,800 |
At 200 assemblies per day × 22 days = 4,400 per month. Average revenue $22, material cost $9, gross profit $13 per assembly. Monthly gross profit: $57,200. Subtract overhead (rent, 3 employees, utilities = $12,000). Net monthly profit: $45,200. Payback: under 2 weeks at full capacity.
The production scenario requires a mature customer base and consistent order flow. Distributors and large service companies typically operate at this level. The CNC crimper’s data logging and quality tracking justify the higher cost when clients require documented compliance.
Safety Guidelines for Hose Crimping Operations
⚠️ Critical Safety Notice
These machines generate forces of 80–320 tons. A crimp failure under pressure can launch metal fragments at high velocity. Always follow these safety procedures.
Personal Protective Equipment (PPE)
Every operator must wear:
- Safety glasses with side shields — metal filings and rubber particles are common during crimping
- Steel-toed boots — hoses and fittings are heavy; a 2″ R13 assembly can weigh 15+ kg
- Work gloves — cut-resistant gloves for handling hose ends after cutting; standard gloves for crimping operations
- Hearing protection — the hydraulic pump on electric machines produces 75–85 dB during the crimp cycle
Do not wear loose clothing, jewelry, or anything that could catch in the dies or moving parts. Tie back long hair.
Pre-Operation Checks
One maintenance detail that gets overlooked: the hydraulic oil inside your crimper. Use 68# anti-wear hydraulic oil (ISO VG 68). Fill to 2/3 of the sight glass. The system relief valve is factory-set at 31.5 MPa — do not adjust it higher, or you risk blowing seals. Check oil level monthly and replace every 2,000 operating hours.
Before starting each shift, the operator should inspect the machine for:
- Die condition: Check for chips, cracks, or uneven wear. A cracked die can shatter under full crimping force.
- Hydraulic oil level: Low oil causes incomplete crimps and can damage the pump.
- Hose connections: Check the machine’s own hydraulic hoses for leaks or damage.
- Die seat cleanliness: Debris between the die segments causes uneven crimp. Wipe the die seat before each setup change.
- Emergency stop: Test the E-stop button to confirm it halts the machine immediately.
Pressure Testing Safety
Pressure testing is the most hazardous step in hose assembly. A failed assembly at 6,000 PSI releases stored energy violently.
- Never stand over or near the hose during pressurization. Use a test bench with a protective shield.
- Never exceed the test pressure specified for the hose type. Standard test pressure is 1.5× working pressure. Burst pressure (typically 4× WP) is for manufacturer qualification only — never test to burst in a workshop.
- Bleed all air from the assembly before pressurizing. Trapped air compresses and stores energy like a spring.
- If a leak appears during testing, do not approach the assembly. Depressurize first, then inspect.
Die Handling
Die sets weigh 2–8 kg each depending on size. Handle them carefully. Never force a die into the die holder — if it does not seat cleanly, check for debris or damage. A die that sits slightly tilted in the holder will produce an uneven crimp, and the uneven force can damage the die or the machine over time.
Store dies in a dry location. After each use, wipe dies with a light oil to prevent rust. Even stainless tool steels can develop surface corrosion that affects crimp quality.
Industry Applications: 5 Sectors That Rely on Hydraulic Hose Crimping
Different industries have different hose requirements. Understanding these differences helps workshop owners stock the right materials and choose the right crimping equipment for their customer base.
Hydraulic fittings are used across industries, but engineering machinery accounts for 62% of all hydraulic fitting consumption — excavators, loaders, cranes, and bulldozers each contain 20–50 hydraulic hose assemblies. This is why construction equipment repair shops are the #1 buyer of hydraulic hose machines.
1. Construction
Construction equipment — excavators, backhoes, loaders, cranes, bulldozers — runs on hydraulic systems. Hose failures on a construction site stop work immediately. A broken hose on an excavator can idle a $500/hour machine and its operator.
Common hose types: SAE 100R1, R2 (sizes 3/8″–1″). Working pressures: 2,000–5,000 PSI. The demand is for speed — construction crews need replacement hoses fast, often within hours. Workshops serving construction clients should stock common sizes and fittings, and be able to turn around assemblies same-day.
2. Mining
Mining equipment operates at higher pressures and in harsher conditions than construction. Hydraulic shovels, crushers, conveyors, and drills use R12, R13, and R15 hoses at pressures up to 6,000 PSI. Hose sizes range from 3/4″ to 4″.
Mining hose assemblies require strict quality documentation. Most mining companies require pressure test certificates for every assembly, with traceability to the hose batch and fitting lot. A CNC crimper with data logging is essential for serving this market.
3. Agriculture
Tractors, combines, sprayers, and irrigation systems use hydraulic hoses extensively. Agricultural hoses tend to be smaller (1/4″–3/4″) and operate at moderate pressures (1,500–3,000 PSI). SAE 100R1 and R2 dominate.
The key difference in agriculture is seasonality. During planting and harvest, demand spikes sharply. A workshop serving farmers needs to handle 3–5× normal volume during peak seasons. Speed and availability matter more than ultra-precise CNC accuracy — most agricultural applications tolerate ±0.1mm crimp tolerance.
4. Oil & Gas
Oil and gas applications demand the highest pressure ratings and the strictest quality controls. Offshore rigs, hydraulic fracturing equipment, and wellhead control systems operate at 5,000–10,000 PSI. Hose types include R15, 4SP, 4SH, and specialized thermoplastic hoses.
Every assembly must be pressure-tested and documented. API (American Petroleum Institute) certification may be required. Crimping equipment for this sector must be CNC-controlled with full data logging.
5. Manufacturing
Factory equipment — hydraulic presses, injection molding machines, CNC machinery, conveyor systems — uses hydraulic hoses in a wide range of sizes and pressures. Manufacturing tends to have the broadest hose diversity of any sector.
A single factory might need hoses from 1/4″ to 2″, in R1, R2, R4, and R12 configurations. The workshop serving manufacturing clients needs a versatile crimping setup that can handle this variety without constant die changes.
How to Choose a Hydraulic Hose Machine
Five questions to answer before you buy:
1. What hose sizes do you crimp most?
Match your crimper tonnage to your largest common hose. A machine too small won’t crimp it. A machine too large is wasted money on small hoses.
2. How many assemblies per day?
Under 20: manual is fine. 20–100: electric. Over 100: CNC with automatic cycling.
3. Do you have power?
Field service: battery or manual. Workshop: electric or CNC.
4. What fittings do you use?
Standard dies cover SAE 100R1/R2, R4, R12/R13/R15, 4SP/6SH. Custom fittings need custom dies.
5. What accuracy do you need?
General hydraulic: ±0.1mm is fine. Safety-critical (brake lines, lifting): ±0.03mm with CNC.
6. What standards do your clients require?
If you serve mining or oil and gas, you need CNC with data logging. If you serve agriculture and construction, an electric machine with manual record-keeping may suffice.
7. What is your growth plan?
Buying a 200T electric now and upgrading to CNC later is a valid strategy. Choose a brand that offers upgrade paths or accepts trade-ins. Buying too small and replacing in 12 months is more expensive than buying the right machine upfront.
Common Problems & Solutions (Troubleshooting Guide)
Problem 1: Crimp diameter is too large or too small.
Solution: Check the die chart for your exact hose + fitting combination. Measure the crimp with a caliper after each setup. Industry-standard crimp tolerance is ±0.05mm. Die wear over time can shift diameter — replace dies when tolerance exceeds ±0.1mm.
Problem 2: Hose slips out of fitting under pressure.
Solution: The crimp force is too low or the die size is wrong. This is called “pull-out failure.” According to crimping theory, an effective crimp must deform the metal past its yield point so that compressed strands make cold-weld contact. Verify tonnage matches the hose specification.
Problem 3: Uneven crimp — one side is tighter than the other.
Solution: The hose is not centered in the die, or the dies are worn unevenly. Center the hose before crimping. Quality dies use a 8- or 10-segment design that distributes force evenly around the ferrule. Worn segments cause uneven pressure.
Problem 4: The fitting ferrule splits or cracks during crimping.
Solution: The crimp force is too high for the ferrule material, or the dies are closing too far past the target diameter. Check the die chart and crimp diameter setting. Brass and aluminum ferrules require less force than steel. Using a 200T machine on a small brass fitting without adjusting the crimp depth will crush the ferrule.
Problem 5: Rubber extrusion — hose cover bulges out from the ferrule after crimping.
Solution: The hose was not skived properly, or too much rubber was left between the wire braid and the ferrule. On multi-spiral hoses (R12, R13, 4SP), the ferrule must make direct contact with the wire reinforcement. Any trapped rubber prevents proper compression. Skive the hose end to the correct length.
Problem 6: Crimp diameter drifts over the course of a production run.
Solution: The machine’s hydraulic system is losing pressure, or the die seat is accumulating debris. Check hydraulic oil level and pump pressure. Clean the die seat between setup changes. On older machines, cylinder seals can wear and allow internal bypass, reducing effective force. Replace seals if pressure drops more than 10% from rated output.
Problem 7: Hoses fail pressure test at the fitting connection.
Solution: The fitting was not inserted to the correct depth before crimping. Most fittings have a insertion mark or a shoulder that indicates proper depth. If the hose is inserted too shallow, the crimp only compresses air. If inserted too deep, the stem blocks flow and creates a stress point. Measure insertion depth before every crimp.
Problem 8: Electric machine motor runs but dies do not close.
Solution: Check the solenoid valve — it may be stuck or not receiving the electrical signal. Listen for a click when the foot pedal is pressed. If there is no click, the solenoid coil may have burned out. Check the hydraulic oil level. If oil is low, the pump runs but cannot build pressure. Check for leaks in the hydraulic lines between the pump and cylinder.
FAQ
What is the difference between a hydraulic hose machine and a crimper?
How much does a hose crimping setup cost?
Can one machine handle all hose sizes?
How often do crimping dies need replacement?
Do I need a skiver for my crimper?
What maintenance does a crimping machine need?
What is the difference between SAE and DIN hydraulic hoses?
Do I need a pressure test bench, or can I skip testing?
Need a Hydraulic Hose Machine?
TRC builds 18 electric and CNC crimping machines from 80T to 320T. Tell us your hose sizes and daily volume — we’ll recommend the right setup.
Related: Hydraulic Hose Crimping Machine Buying Guide · Crimping Machine Guide
Get a Quote →


