Hydraulic Hose Crimping Machine Setup: From Unboxing to First Crimp
Setting up a hydraulic hose crimping machine is the single most important step between buying equipment and producing leak-free assemblies. Whether you’re running a new hose crimper machine for the first time or rebuilding an old workshop, this guide walks through every step. This guide covers everything from unboxing to your first 100 crimps — die selection, calibration, and the five mistakes that waste material on day one.
Quick Specs: What You’re Working With
| Parameter | Range | Why It Matters |
|---|---|---|
| Tonnage | 60–1,750 T | Determines max hose diameter |
| Hose range | ¼″–6″ | Must cover your daily work |
| Control type | Manual / Auto / CNC | Affects speed and repeatability |
| Crimp accuracy | ±0.1 mm (CNC: ±0.05 mm) | Leak-free vs. warranty claim |
| Cycle time | 8–30 seconds | Production volume per day |
| Power | 220V / 380V / Battery / Hand pump | Workshop vs. field |
| Die sets included | 6–18 sets typical | Covers how many fitting types |
What You Need Before Setup
Before the crate arrives, make sure you have these three things sorted.
1. Electrical
- 220V single-phase for machines up to 200 T (P16HP, P20 class)
- 380V three-phase for machines above 200 T (P32, P120, TRC120L class)
- Dedicated 30A breaker — don’t share the circuit with a welder or compressor
- Grounded outlet. No adapter plugs.
2. Bench Space
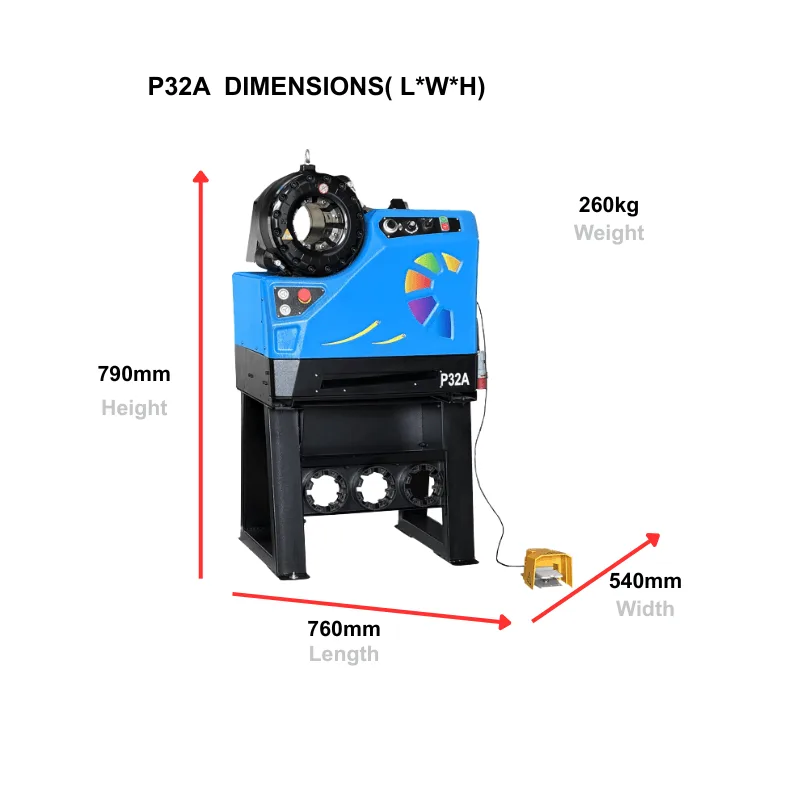
- Minimum 1.2 m × 0.6 m work surface for the machine
- 0.5 m clearance on all sides for die changes and hose handling
- Bolt the machine down. A 200 T crimper generates real force — it will walk across the bench if you don’t.
3. Tools
- Digital caliper (0.01 mm resolution) — not a tape measure
- Die chart from the manufacturer — laminate it and tape it to the wall
- Clean rag and denatured alcohol for cleaning dies before each use
- Test hose assembly kit (hose + ferrules + fittings) for first crimp verification
Step 1: Unboxing and Inspection
Don’t skip this. Shipping damage to a hydraulic crimper happens more often than you’d think — especially on larger hydraulic hose crimp machines that weigh 200+ kg.
- Check the crate for impact marks. If the crate is cracked or dented, photograph it before opening.
- Remove all packing material. Check for loose parts in the bottom of the crate — die sets and hoses sometimes shift during transit.
- Inspect the die holder. The crimping head should move freely with no visible scoring or rust.
- Check hydraulic oil level. Sight glass should show oil between the two marks. Top up if needed (ISO VG 46 hydraulic oil).
- Verify die set count. Match against the packing list. A missing die set on day one stops work.
Step 2: Bench Mounting and Leveling
The machine needs to be level. If it’s tilted, the die closure won’t be concentric — and concentricity is what makes a crimp seal.
- Place the machine on the bench in its final position.
- Use a spirit level across the die holder face. Adjust feet or shims until bubble is centered.
- Bolt through the base plate into the bench. Use all four mounting points — not two.
- Torque the mounting bolts to the spec in the manual (typically M12 at 45 Nm).
- Re-check level after bolting. The bench can warp.
Step 3: Die Selection and Installation
This is where most first-timers make mistakes. The die set must match three things: hose type, fitting type, and hose size.
Die Compatibility Quick Reference
| Hose Type | Fitting Style | Die Series | Example |
|---|---|---|---|
| 1-wire braid (R1) | One-piece | Standard | ¼″–1″ |
| 2-wire braid (R2) | One-piece | Standard | ¼″–2″ |
| 4-spiral (R12) | Interlock | Heavy | ¾″–2″ |
| 6-spiral (R13) | Interlock | Extra-heavy | 1½″–6″ |
Installing the wrong die produces an undercrimp or overcrimp — both cause leaks. When in doubt, check the manufacturer’s die chart, not the die number stamped on the metal.
Installation Steps
- Clean the die holder and die faces with denatured alcohol.
- Insert the die halves into the holder. The numbered faces go outward.
- Check that all die segments sit flush — no gap between segments.
- Run one empty cycle (no hose) to verify die closure is even all around.
Step 4: Calibration
Calibration is what separates a workshop that produces 99.7% good crimps from one that gets 85%. Your target: ±0.1 mm on crimp diameter.
- Select a test hose + ferrule + fitting combination you’ll use daily.
- Set the crimp diameter from the die chart (e.g., 27.3 mm for a ¾″ R2 assembly).
- Run the crimp cycle.
- Measure the crimped diameter at three points (top, middle, bottom) with a digital caliper.
- If the average is within ±0.1 mm of target: you’re calibrated. Record the setting.
- If it’s off by more than 0.1 mm: adjust the crimp stop and repeat. Most CNC machines store this automatically.
“We calibrate every morning before the first run. It takes 3 minutes and saves us from 2-3 bad crimps per day. At $15 per assembly, that’s $30-45 saved before lunch.” — Workshop foreman, hose assembly shop, Texas
Step 5: Your First Crimp
Now the moment you bought the machine for.
- Cut the hose square using a hose cutting machine or a fine-tooth saw. Deburr the end.
- Insert the fitting into the hose. Push until the ferrule seats fully against the hose cover.
- Measure the insertion depth. Mark it with a grease pen. If the ferrule pulls back during crimping, the assembly is scrap.
- Place the assembly into the die holder. The ferrule must be centered in the die opening.
- Run the crimp cycle. Hold the hose steady — don’t let it twist.
- Measure the crimped diameter at three points. All within ±0.1 mm of target.
- Visual inspection: No die marks deeper than 0.1 mm on the ferrule surface. No visible gap between ferrule and fitting stem.
5 Common Hydraulic Hose Crimping Machine Setup Mistakes
Mistake 1: Wrong Die Set for the Fitting
Symptom: Ferrule is visibly deformed after crimp — oval instead of round.
Cause: Using a standard die set on an interlock fitting, or vice versa.
Fix: Check the fitting type (one-piece vs. interlock) before selecting the die. Die charts list this explicitly.
Mistake 2: Ferrule Not Fully Seated Before Crimp
Symptom: Ferrule pulls back 2-3 mm during crimping. The crimped assembly leaks at the stem.
Cause: Operator didn’t push the fitting all the way in, or the hose end wasn’t cut square.
Fix: Measure insertion depth and mark it before crimping. If the mark moves, stop and re-seat.
Mistake 3: Machine Not Level
Symptom: Crimp diameter varies more than 0.2 mm between top and bottom measurement.
Cause: Uneven bench or loose mounting bolts.
Fix: Re-level with a spirit level. Re-torque mounting bolts monthly.
Mistake 4: Skipping the Calibration Step
Symptom: First 10 assemblies fail pressure test.
Cause: Crimp stop set to factory default, not adjusted for your specific hose + fitting combination.
Fix: Always calibrate with a test assembly before production. Different hose brands have slightly different wall thicknesses.
Mistake 5: Dirty Die Faces
Symptom: Deep gouge marks on ferrule surface after crimp.
Cause: Metal shavings or debris on die segments from previous work.
Fix: Wipe die faces with denatured alcohol before each crimp session. Takes 10 seconds.
Production Optimization: Reaching 100 Crimps Per Day
Once your electric hydraulic hose crimper is calibrated and you’re comfortable with the process, here’s how to scale up.
Workflow Layout
| Station | Equipment | Time Per Assembly |
|---|---|---|
| Cut | Hose cutting machine | 30 seconds |
| Skive (if required) | Skiving machine | 45 seconds |
| Insert fitting | Bench vise + mallet | 20 seconds |
| Crimp | Hydraulic hose crimping machine | 15 seconds (cycle) + 10 seconds (load/unload) |
| Inspect | Digital caliper + visual | 15 seconds |
| Total | ~2 minutes per assembly |
At 2 minutes per assembly with a 7-hour work day (accounting for breaks and material handling): 210 assemblies per day with a CNC machine. Manual machines run slower at roughly 60-80 per day due to hand pump fatigue.
ROI Timeline
A manual hydraulic hose crimper costs $400-800 and pays for itself in 2-3 months if you make 5 assemblies per week. An electric CNC machine costs $2,500-8,000 and pays for itself in 3-6 months at 20+ assemblies per week.
| Machine Type | Cost Range | Weekly Volume | Break-even |
|---|---|---|---|
| Manual (hand pump) | $400–800 | 5–15 assemblies | 2–3 months |
| Electric (standard) | $1,500–3,000 | 15–40 assemblies | 3–4 months |
| CNC (servo control) | $3,000–8,000 | 40–200+ assemblies | 3–6 months |
The math is simple: if you’re buying pre-made assemblies at $35-80 each, and a DIY assembly costs $8-12 in materials, every crimp saves $25-65. Even a $3,000 CNC machine breaks even at 50 assemblies.
Frequently Asked Questions
How long does it take to set up a hydraulic hose crimping machine?
Plan for 2-4 hours from unboxing to your first good crimp. This includes bench mounting (30 min), die installation (20 min), calibration (30 min), and test crimps (20 min). The rest is reading the manual and organizing your workspace.
Do I need special electrical wiring?
Machines under 200 T typically run on standard 220V single-phase (the same outlet as a clothes dryer). Machines above 200 T usually need 380V three-phase. Check the nameplate on your specific machine before assuming.
Can I crimp different hose types on the same machine?
Yes. You change the die set, not the machine. A single hydraulic hose crimping machine handles R1, R2, R12, R13, R15, and R17 hose — as long as you have the correct dies and sufficient tonnage.
How often should I recalibrate?
Every morning before the first run, or whenever you change die sets. CNC machines with data logging can go longer between calibrations, but daily verification catches problems before they become scrap.
What’s the most common cause of crimp failure?
Wrong die set for the fitting type. Using a one-piece die on an interlock fitting (or vice versa) produces a crimp that looks fine but fails under pressure. Always match die → fitting → hose before crimping.