
Hydraulic hose crimping tool shopping is harder than it should be. Every manufacturer claims “industrial grade” and “precision crimping.” But strip away the marketing and five specs actually matter: tonnage, die range, cycle speed, build quality, and after-sale support. This guide covers those five features, compares five tool types, and gives you an honest look at TRC’s product line — including where it falls short.
What Makes a Professional Hydraulic Hose Crimping Tool
A professional crimping tool differs from a budget unit in three ways: it holds crimp diameter tolerance across thousands of cycles, it covers the full die range you need (not just the popular sizes), and the manufacturer stands behind it with spare parts and technical support. If any of those three are missing, you’re holding a disposable tool.
5 Must-Have Features
1. Tonnage That Matches Your Hose
Tonnage determines what you can crimp. A 60-ton tool handles 1″ 2SP wire braid. A 200-ton tool handles 2″ 4SP multi-spiral. Buy too little tonnage and you can’t crimp your largest assemblies. Buy too much and you’re paying for capacity you never use. Check the crimp chart for every hose size you assemble — then add 20% headroom. That margin covers stiff 4SH hose and older fittings that resist compression.
2. Die Range Coverage
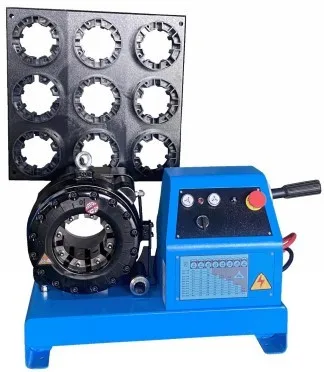
The tool is only half the equation. The die set is the other half. A tool that doesn’t carry your needed die sizes is useless, no matter how many tons it produces. Standard dies for common sizes (¼″ through 1″ 2SP) are usually included. Specialty sizes (½″ 4SP, 1¼″ 6SP, metric) often cost extra. Before you buy, verify that every die size in your crimp chart is available for that tool series — not just “available” on a catalog page, but actually in stock and shippable within a week.
3. Cycle Speed
Manual hand-pump tools: 30–60 seconds per crimp. Electric motor-driven tools: 8–15 seconds. CNC tools with auto-cycle: 6–10 seconds. If you’re doing 5 crimps a day, speed doesn’t matter. If you’re doing 50, every second saved per crimp adds up to real money over a year. A bench-top electric tool pays for itself in labor savings alone when you cross roughly 20 crimps per day.
4. Build Quality You Can See
Open the die area. Look at the die holder — is it machined steel or cast iron with visible porosity? Check the hydraulic lines — are they braided steel or rubber? Toggle the pump — does it engage smoothly or grind? A well-built tool feels solid and operates smoothly from the first crimp. A cheap one feels fine out of the box and starts showing play after 500 cycles.
5. After-Sale Support
Dies wear out. Seals leak. Electronics fail. When something breaks, you need spare parts fast — not in six weeks from a factory across the ocean. Ask the supplier: can you ship replacement dies within 3 days? Do you have a technician who can troubleshoot over video call? Is there a warranty that actually covers manufacturing defects, or does it exclude everything that matters?
5 Types of Hydraulic Hose Crimping Tools
Electric Bench-Top
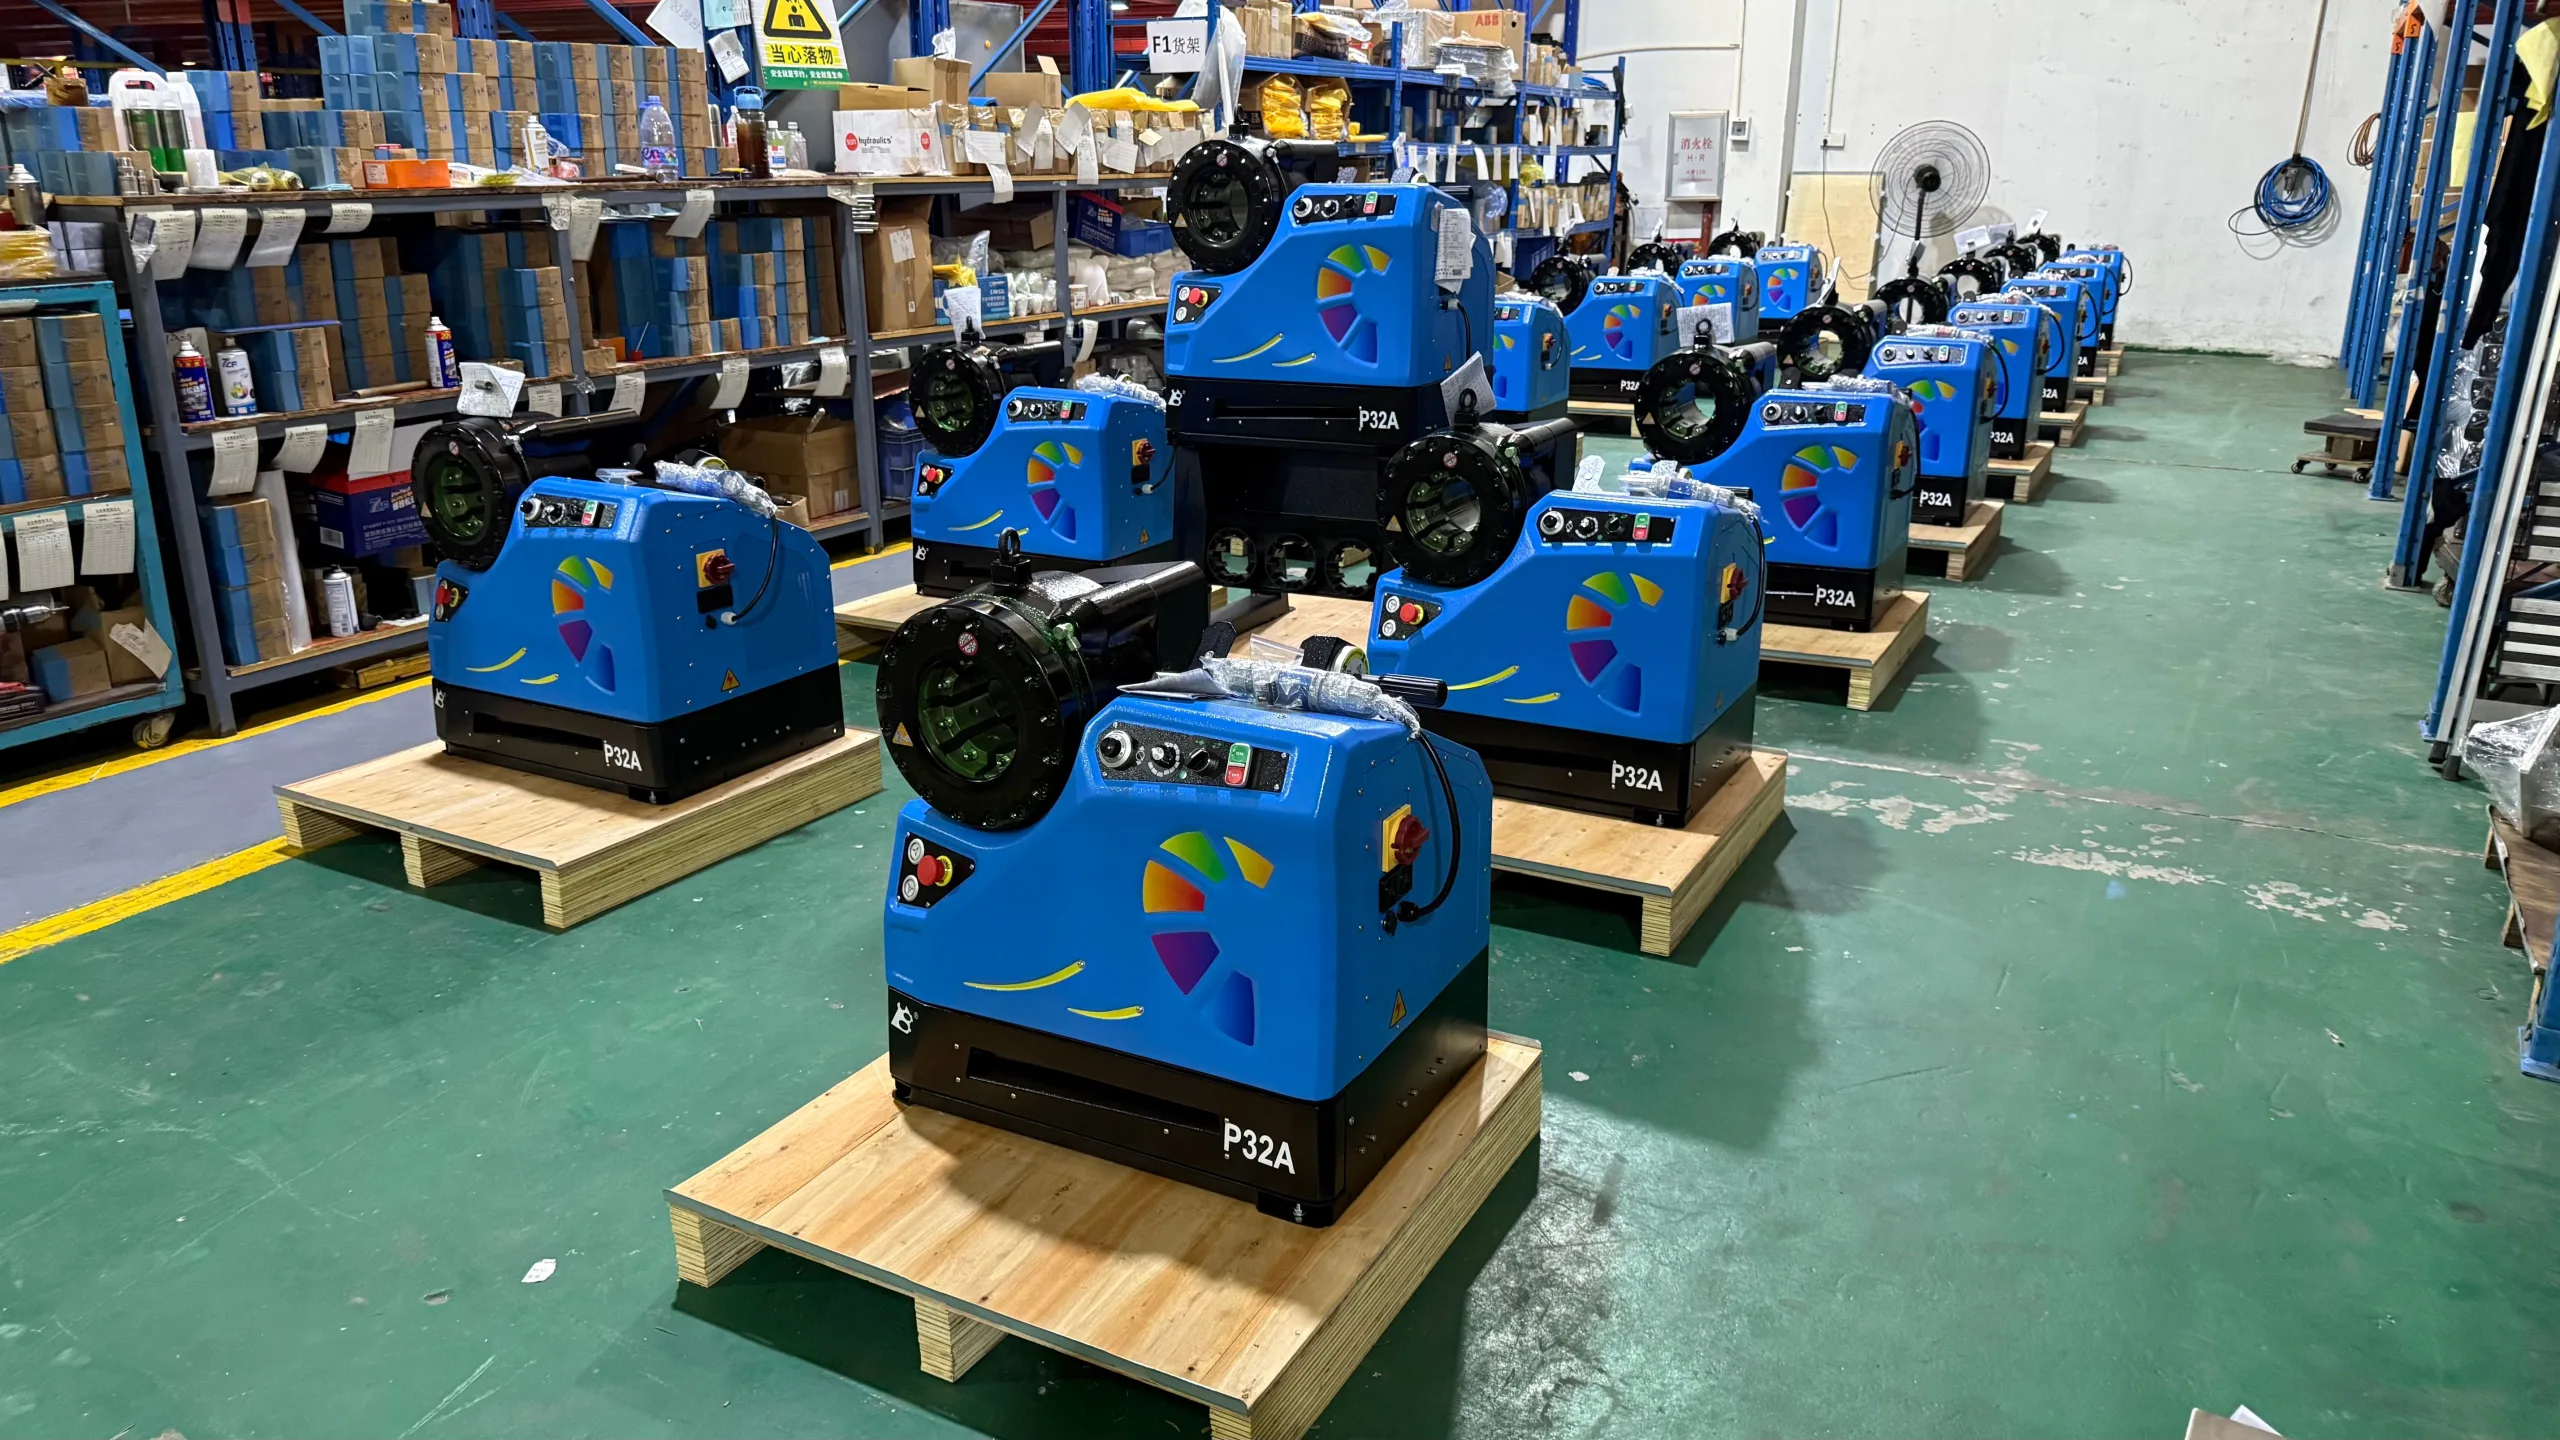
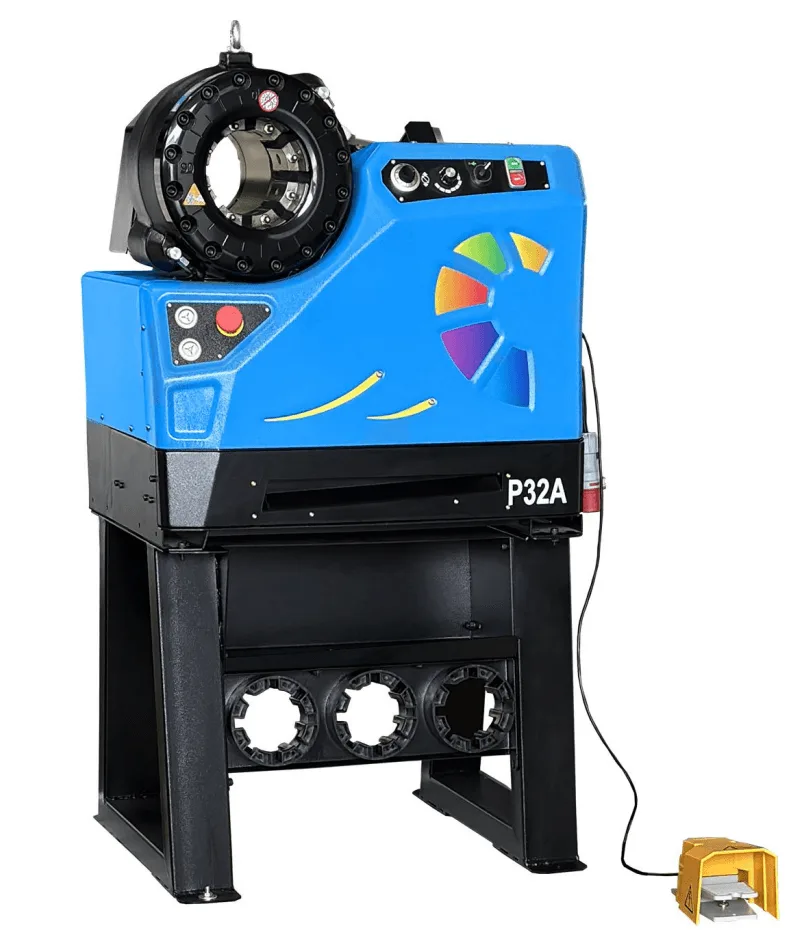
The workhorse of professional workshops. Motor-driven pump, button or foot-pedal activation, 150–200 tons. The TRC P32A sits here — 200 ton, covers up to 2″ 4SP, auto-retract die, built-in caliper holder. At roughly 80 kg it stays put on the bench. Honest downside: you need power (single-phase or three-phase) and it’s not portable.
Pneumatic (Air-Pump)
Uses your shop’s compressed air instead of an electric motor. Same die set as the manual equivalent, same crimp force, less operator fatigue. TRC’s AP-series pneumatic tools deliver 95–137 tons with 6–8 bar air. Trade-off: you need an air compressor nearby, and the tool isn’t portable. Good for shops already set up with air lines at every station.
Manual (Hand-Pump)
No power, no air. You pump the lever to build pressure. TRC’s HP-series ranges from 95 to 137 tons in a 15–45 kg package. The P16HP at 34 kg is carry-on portable — one person can move it from the truck to the machine. Downside: physical effort adds up. After 20 crimps, your arm knows it.

Portable Electric
Smaller motor, lighter frame, sometimes battery-powered. Tonnage tops out at 60–120 tons. Enough for 1″ to 1¼″ 4SP — not enough for 2″. The P20CS at 137 tons with a compact frame bridges the gap between portable and bench-top.
Bench-Top CNC
Programmable crimp diameter, multi-step crimp cycles, data logging. The TRC P32D adds a CNC controller to the P32 platform. Every crimp is repeatable within 0.02mm. If you’re doing production runs where consistency matters more than speed, this is the tool. The cost premium over a standard electric is roughly 30–40%.
Die Selection Guide

Every hose-fitting combination has a target crimp diameter. You find that number on the die chart — usually printed on a label inside the die box or in the machine manual. The die set number (like P32/10 or P16/14) tells you which die fits which machine series and which hose size it handles.
Common mistake: using a die that’s close but not exact. A die rated for ½″ 1SC will under-crimp a ½″ 2SP fitting because the hose construction is different. Always match the die to the exact hose type (1SC, 1SN, 2SC, 2SN, 4SP, 4SH) — not just the diameter.
Common Mistakes and How to Avoid Them
Skipping the caliper check. Measure every 10th crimped assembly. If the diameter drifts more than 0.1mm from target, stop and troubleshoot. Drift usually means die wear or a hydraulic pressure issue.
Not lubricating the die. A light coat of hydraulic oil on the die faces before each session reduces wear and helps the ferrule compress evenly. It takes 10 seconds. Skipping it costs you die life.
Over-crimping to “be safe.” Under-crimping leaks. Over-crimping damages the fitting inner surface and creates a failure point that doesn’t show up until the system is under full working pressure. Trust the crimp chart number.
Ignoring hose skiving. Some fittings require skiving (removing the outer rubber cover) before crimping. If the crimp chart says “skive” and you don’t, the ferrule can’t grip the wire reinforcement properly. The crimp looks fine but blows off under pressure. Always check whether your fitting type requires skiving.
For the technical background on crimping mechanics, Wikipedia’s crimp joining article covers the physics well.


