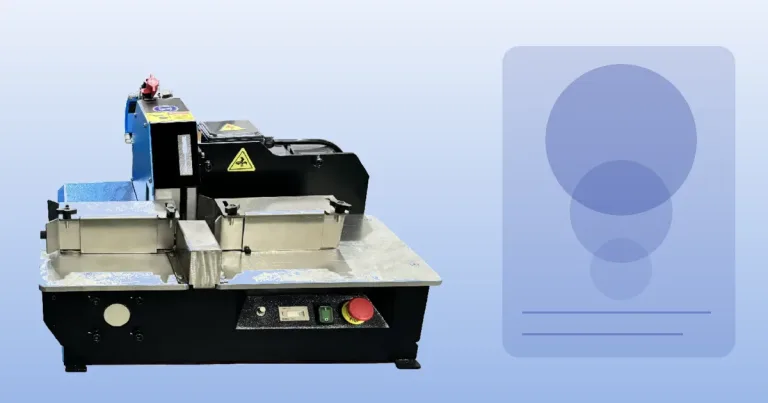
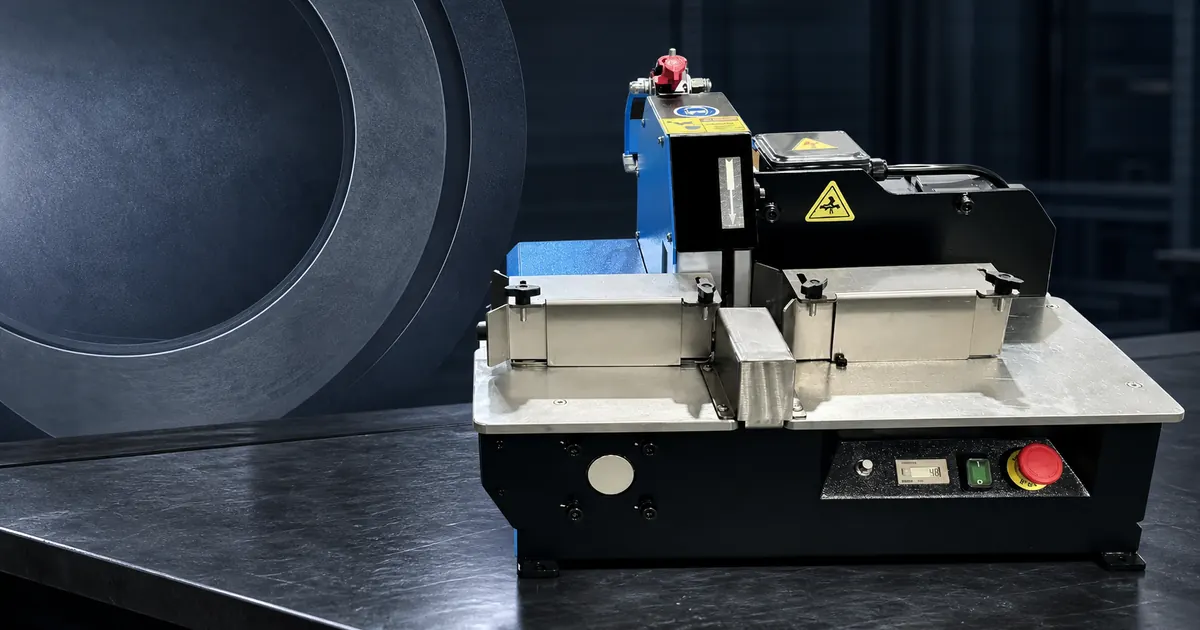
Eine hydraulische Schlauchschneidsäge muss Gummi und Verstärkung schneiden, ohne die Bohrung zu quetschen, Draht aus dem Ende zu ziehen oder unzulässige Hitze und Ablagerungen zu erzeugen. Die Wahl der Klinge hängt von der Schlauchkonstruktion und der antreibenden Maschine ab.
Eine abgenutzte Klinge kann eine gute Maschine schlecht aussehen lassen
Eine Säge, die letzten Monat noch sauber geschnitten hat, hinterlässt jetzt Hitzespuren und freiliegende Verstärkung. Bevor die Maschine gewechselt wird, sollte der Bediener Klingentyp, Zustand, Vorschubdruck, Werkstückspannung und die Verfügbarkeit von Ersatzklingen-Unterstützung überprüfen.
Sägeblatt oder gerades Messer?
Ein angetriebenes Kreissägeblatt ist für wiederholte Arbeiten an verstärkten Schläuchen üblich, da es die Bewegung durch Drahtlagen aufrechterhalten kann. Ein gerader Schlauchschneider kann für weichere oder kleinere Schläuche geeignet sein, wenn das Werkzeug für dieses Material ausgelegt ist.
Keine Methode ist universell besser. Überprüfen Sie den härtesten Schlauch, nicht die einfachste Probe.
| TRC-Beispiel | Aufgezeichnete Klinge | Motor | Aufgezeichneter Schlauchumfang |
|---|---|---|---|
| C250AC | 250 × 3,5 × 32 mm | 1,5 kW, 3-phasig 380 V | Bis zu 1 Zoll 4SH |
| C300 | 300 × 4 × 32 mm | 4,0 kW 3-phasig oder 2,2 kW einphasig | Bis zu 2 Zoll 4SH |
| C400F | 400 × 4 × 50 mm | 5,5 kW | Bis zu 2 Zoll 4SH |
| C520A | 520 × 4 × 50 mm | 5,5 kW | Bis zu 6 Zoll Industrieschlauch |
Diese Spezifikationen stammen aus der Produktdatei. Tauschen Sie keine Klingenabmessungen zwischen Maschinen aus und gehen Sie nicht davon aus, dass eine größere Klinge automatisch einen saubereren Schnitt ergibt.
Bewerten Sie eine Schnittprobe
Überprüfen Sie das Ende auf:
- rechtwinkligen Schnitt relativ zur Schlauchachse;
- offene, unverformte Bohrung;
- kontrollierte Verstärkung;
- keinen verbrannten Gummi oder starke Glasur;
- keine losen Partikel im Schlauch;
- akzeptable Oberfläche für den nächsten Vorbereitungsschritt.
Der Armaturenlieferant kann nach dem Schneiden eine Markierung, ein Schälen oder einen anderen Vorbereitungsschritt verlangen.
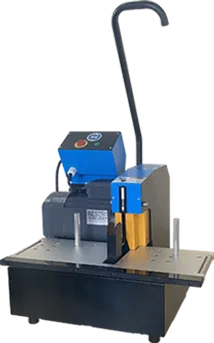
Der Klingenzustand verändert das Ergebnis
Ersatzklingen für Schlauchschneider sollten vom Maschinenhersteller angegeben werden. Der Durchmesser allein bestimmt nicht die Dornpassung, Dicke, das Material oder die Betriebseignung.
Häufige Anzeichen dafür, dass eine Klinge überprüft werden muss, sind langsamerer Vorschub, erhöhte Hitze, Reißen, Drahtauszug und größerer Kraftaufwand des Bedieners. Überprüfen Sie zuerst Klingenzustand, Einbau und Maschineneinstellung. Kompensieren Sie dies nicht, indem Sie den Schlauch mit Gewalt in die Klinge drücken.
| Schnittsymptom | Klingenbezogene Prüfung | Andere Prüfung |
|---|---|---|
| Rauch oder glasierter Gummi | Stumpfe oder ungeeignete Klinge | Vorschubdruck |
| Herausgezogener Draht | Schneidenzustand und Klingenabstimmung | Schlauchabstützung |
| Schräge Stirnfläche | Ungleichmäßiger Klingeneintritt oder Beschädigung | Schlauchverdrehung |
| Zunehmender Grat oder Ablagerungen | Klingenverschleißtrend | Reinigungsprozess |
| Steigender Bedieneraufwand | Klingenzustand | Klemmung und Ausrichtung |
Die Reinigung ist eine separate Kontrolle
Das Schneiden erzeugt Ablagerungen. Gates’ Leitfaden zur Sauberkeit von Schlauchleitungen weist darauf hin, dass abrasive Methoden mehr Staub und Schlauchfragmente erzeugen können als kontrolliertes Schneiden. Unabhängig von der verwendeten Methode benötigt die Werkstatt ein definiertes Reinigungsverfahren nach dem Schneiden.
ISO/TS 18409:2018 unterstützt die Probenentnahme für die Kontaminationsanalyse. Es genehmigt keine bestimmte Klinge und verspricht nicht, dass Druckluft allein ausreichend ist.
Technischer Hinweis: Ein abriebarmer Schnitt unterstützt die Reinigung. Er zertifiziert die Baugruppe nicht als sauber.
Schutzvorrichtungen und Werkstückspannung
Halten Sie die Eingriffsstelle geschützt und stützen Sie den Schlauch so ab, dass er sich nicht verdrehen oder den Bediener zur Klinge ziehen kann. OSHA 1910.212 is a useful general machine-guarding baseline, while the actual machine manual remains the operating authority.
Browse the TRC Hydraulikschlauchschneider-Kategorie and provide hose construction, OD and workload when requesting a blade or machine recommendation.
The buyer should photograph the normal loading position during a trial. Look for hands crossing the cutting plane, unsupported coil tension and cut pieces falling back toward the blade.
Blade speed and blade identity belong together
A replacement blade must match the arbor, thickness, material and operating speed of the machine. OSHA has warned in another cut-off-machine context that fitting a blade designed for a different speed and purpose can raise reactive forces and failure risk. The practical rule is simple: do not improvise a “similar” blade from diameter alone.
After installation, verify direction, seating, guard position and free movement using the machine instructions. Make the first cut without forcing the feed. A blade that needs excessive pressure is not ready for production.
TRC records C300 at 2,850 rpm on 50 Hz and 3,370 rpm on 60 Hz. C400F uses the same recorded speed values with a different 400 × 4 × 50 mm blade and 5.5 kW motor. These model-specific values explain why a blade recommendation must name the machine.
Überprüfen Sie die C300 product page oder C400F product page for the matching route.
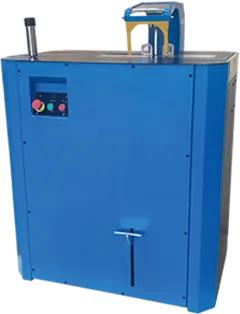
Separate four causes of a poor saw cut
Do not correct every defect by pushing harder. First inspect the blade: identity, direction, damage and contamination. Then inspect the machine: arbor seating, guard, movement and specified speed. Third, check work holding and whether the hose bends or twists at the blade. Finally, check whether the selected saw method suits the reinforcement.
Change one factor at a time and make another sample. This preserves the evidence needed to select a replacement blade or a different cutting method. Random adjustment can produce one acceptable end without revealing why the previous cuts failed.
Set a blade-change trigger before production
Do not wait for smoke or exposed wire. Record cut quality at the start of each shift or batch using the same reference hose when practical.
| Trigger | Aktion |
|---|---|
| Cut face moves outside the shop criterion | Stop and inspect blade, support and feed |
| Operator must add force to maintain output | Review blade condition |
| Debris rises from the normal baseline | Check blade and cleaning route |
| Blade damage or missing material is visible | Isolate machine and replace per manual |
| Replacement blade identity differs | Obtain supplier approval before installation |
The trigger can be visual, dimensional or based on a controlled number of cuts. Use shop data; do not invent a universal blade-life interval.
Run a three-stage saw trial
Make an initial cut after setup, a cut after the machine has reached normal operating condition and a final cut at the end of the planned batch. Inspect all three.
Verwendung stable accepted output = accepted cuts ÷ total trial time. Include blade inspection, loading, cutting, cleanup and end inspection. A supplier who quotes only the instant of blade contact has not measured the shop’s task.
Profi-Tipp: Keep the rejected cut beside the accepted cut during training. Operators learn faster from a visible defect than from the phrase “cut quality must be good.”
Read the complete blade marking before ordering
The replacement request should include machine model, blade diameter, thickness, bore, direction and any manufacturer reference. Photograph both sides of the installed blade after the machine has been isolated according to the manual.
Do not rely on a handwritten label from an old storage box. Match the replacement to the current machine record.
| Purchase field | Warum sie wichtig ist |
|---|---|
| Diameter | Must fit machine and guard arrangement |
| Thickness | Changes fit and cutting behavior |
| Bore | Must match the mounting system |
| Material and edge | Must suit the intended hose and speed |
| Direction | Controls correct installation |
| Maximum permitted speed | Must be compatible with machine operation |
The manufacturer should resolve any mismatch. An operator should not enlarge a bore, add improvised spacers or run a blade outside its stated route.
Use one-variable troubleshooting
Suppose the cut begins pulling wire after a month. First inspect and, if approved, replace the blade without changing hose support or feed. Run the reference hose again.
If the defect remains, review support and twisting. Then review whether the hose construction changed. This sequence preserves the evidence.
Changing blade, feed pressure and support at the same time may produce a better cut, but the team will not know which change worked. The problem returns at the next blade change.
Track blade condition through the batch
Record first-piece quality and check at a buyer-defined interval based on risk and observed wear. The interval may be every batch for mixed low-volume work or a set number of pieces in stable production.
Verwendung accepted cuts between blade changes ÷ blade cost only as a local cost measure after enough history exists. Do not publish the result as universal blade life.
The better maintenance question is whether the blade is replaced before cut quality and operator effort drift outside the accepted range.
Include guarding in the replacement review
A blade with the correct bore may still be wrong for the existing guard or operating speed. Check guard clearance and machine instructions before running.
OSHA’s general guarding rule supports control of points of operation, rotating parts and flying material. It does not approve a particular blade-machine combination.
Write the failure report so a supplier can help
Send the machine model, blade marking, hose identity, photos of the full setup and close photographs of the defect. State when the problem began and whether it changes after warm-up.
A message saying “the blade is bad” gives the supplier little to diagnose. A labeled first, middle and final sample often shows whether wear, heat or handling is developing through the run.
Work through a replacement-blade decision
A C300 operator sees more wire pull and smoke. The installed blade marking matches the recorded 300 × 4 × 32 mm dimensions, but the edge is visibly damaged.
The team isolates the machine under its procedure, records the old blade and installs the approved replacement. It then runs the reference hose without changing feed or support.
If the cut returns to the accepted condition, the evidence points to blade condition. If not, the team continues with seating, support, feed and material review. That is more defensible than ordering a higher-power machine after one bad week.
Keep cutting speed inside model records
C300 and C400F product records list 2,850 rpm at 50 Hz and 3,370 rpm at 60 Hz. These are model values, not instructions to alter speed.
The destination power configuration should match the machine. An operator should not change pulleys, motor or frequency to chase a cleaner cut without manufacturer review.
Review the blade after abnormal contact
If metal, a fitting or another foreign object reaches the blade, stop and inspect. Do not continue because the next empty rotation sounds normal.
Check guard, mounting and cutting area for damage. Remove affected product from the good batch until reviewed.
Control blade storage
Store replacements dry, protected and identified. Keep edges from contacting other tools.
Use first-in, first-out where shelf condition and supplier guidance support it. Do not remove the manufacturer’s marking.
Make training machine-specific
Show operators the C300 or C400F controls, guard, feed position and stop route. General saw experience is not enough.
Use accepted and rejected cut samples. Ask the operator to name the first check for heat, wire pull and angled faces.
Review the arbor and mounting without improvisation
Maintenance should inspect the mounting parts named by the machine manual. Worn or damaged components can affect blade seating.
Do not add washers, machine the bore or tighten by feel outside the documented method. Ask the supplier when the assembly differs from the drawing.
Keep a blade issue out of purchasing shorthand
The purchase order should state model and complete blade specification. “One spare cutter blade” invites substitution.
Receiving should compare marking and dimensions before adding it to service stock.
Use photographs that show scale
Include the whole hose end and a close view with a scale. A macro image alone can make a small rubber strand look like major wire pull.
Photograph the blade only after safe isolation. Do not remove guards for a better marketing image.
Decide when another cutting method is needed
If the approved blade and setup still burn, pull wire or deform the bore on a specific hose, stop forcing the saw route.
Provide the supplier with the material cross-section and acceptance need. A different blade or machine may be required.
Keep the failed sample and complete blade record until the issue is closed. When the new method arrives, test it against the same hose and end criterion. This creates a fair comparison.
The goal is not to prove that a saw can cut every hydraulic hose. It is to define a stable range where the machine, blade and support produce ends the assembly process can accept.
Put that range on the maintenance and sales records. When a new reinforcement or OD appears, request another trial instead of quietly expanding the promise. This preserves the evidence behind the original blade selection.
If the trial fails, record the material and defect. The rejection is useful selection data, not wasted work.
Read the cut end before changing the machine
The cut face gives useful clues if you inspect it immediately. Wire pulled in the direction of feed can point to a dull or unsuitable blade, unstable support or an aggressive feed. A flattened bore may come from clamping or bending rather than the saw itself. Glazed rubber and odor suggest heat that deserves investigation.
We recommend photographing the same hose under controlled trial conditions. Record the hose reference, OD, reinforcement, blade reference, machine, support arrangement and operator feed method. Make at least three cuts after the setup is stable. One attractive sample does not show repeatability.
In an illustrative distributor workshop, operators complain that a two-wire hose “sometimes explodes” at the cut. Review shows that short pieces are supported, while long pieces hang from the coil and rotate as the blade enters. Adding a feed guide and offcut support removes most variation without increasing motor power.
Technischer Hinweis: A larger motor cannot correct an unidentified blade or unsupported workpiece. Power is only one part of the cutting system, and more aggressive feed can increase heat, deformation and wire damage.
After the mechanical problem is solved, define the cleaning and end-protection route. ISO/TS 18409 describes methods for sampling contamination from hydraulic hose assemblies; it does not promise that a particular saw or air blow produces a clean assembly. If the end application has a cleanliness target, connect preparation, cleaning, sampling and protection as one controlled process.
Blade change records also help. Note the installation date, hose mix and reason for removal. Over several months, that history shows whether shortened blade life follows a particular material, feed habit or alignment issue instead of encouraging premature replacement on a fixed calendar.
Häufig gestellte Fragen
What is the best tool for cutting wire-braided hydraulic hose?
Use a guarded powered cutter with a blade and feed method proven on the exact hose construction. Test the hardest normal hose and inspect squareness, bore shape, reinforcement and debris.
Request a blade recommendation with evidence
Send TRC the machine identity, current blade marking, hose cross-section, OD and defect photos. That information is safer than ordering a hose cutter replacement blade by size alone.